|
|
Post by airdave on Apr 12, 2018 8:13:26 GMT -5
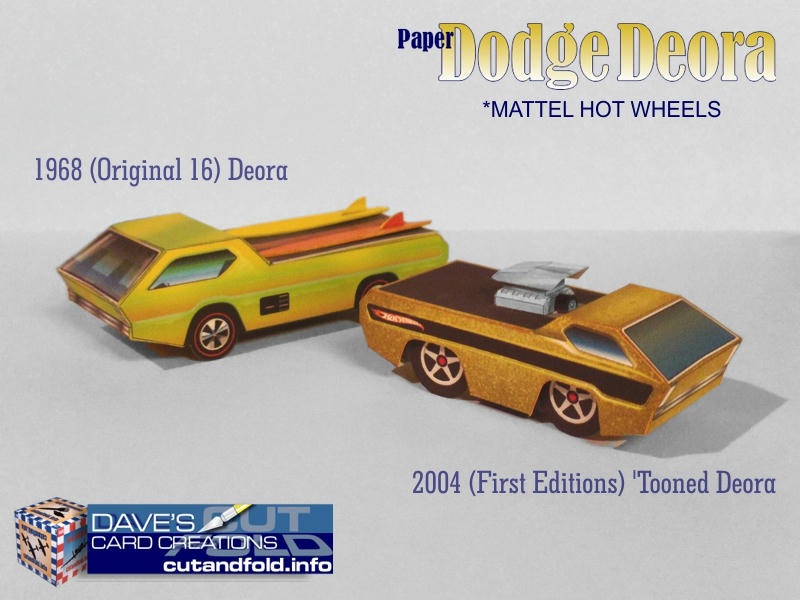
For my entry in the Mild2Wild contest, I am going to try some papercraft Toons... first up, a new Tooned Deora. I have already created a publicly shared paper model kit for the Deora, which I based on the Hot Wheels diecast design. And then I did a followup kit of the newer Hot Wheels Tooned Deora. [Shown below]  ... For my Mild2Wild entry I am going to do a fresh build of the newer model and 'toon it a bit further. Beef up the motor, increase the surface details, and get some "big boots" underneath! Hopefully something like this sketch:  |
|
|
|
Post by jffj on Apr 12, 2018 10:37:56 GMT -5
Looks like it's already ready for those big meats, judging from the 'Tooned version up top👍👍
John
|
|
|
|
Post by airdave on Apr 16, 2018 11:54:29 GMT -5
I was just reading the clarification of categories for this contest...mild and wild. So I assume I have to decide what this build will be classed? Mild is basically modifying a kit thats already out there. This is definitely based on a previous kit that I created and released in 2015. (Its a free download, print and build kit) But since I'm the original designer and scratchbuilder, and I have to go back to the computer to redesign the kit, I'm gonna call this Wild (basically scratchbuilt). If theres a problem with this classification, please let me know. I'll repeat this comment in my other entry thread. ------------------------------------- I have finished the artwork and created the basic body parts for the Deora. First model sheet is printed. A few minor alterations to the original tooned Deora design...biggest changes will be in the chassis components. I have created extra side panels, so I can cut out and layer the parts for more 3D effect. there are also extra layering parts for things like the grill, headlamps, exhaust ports, etc I think I've already done some scoring (in this photo) and the next step is to hand cut all the parts.  |
|
|
|
Post by jffj on Apr 16, 2018 17:11:52 GMT -5
I am always amazed at the paper models. I have a fairly good understanding of the process, and now know a little more.
Very cool, the layering, to help shape it 😎😎
Thanks for sharing it all.
John
|
|
|
|
Post by airdave on Apr 16, 2018 21:46:05 GMT -5
Layering is just to add more surface 3D effects.
is that what you mean by "shape"?
In this case the Deora sides have an inset section painted black.
I will cut the hole in the second layer part and glue it on top of the full body side.
It will also amplify the shoulder step just below the side windows and the base of the pillars.
I'll also layer the front chrome and headlamps strip to make it stick out more
and add a third layer to the horizontal trim pieces below the headlamps.
Same with the rear tailgate panel and exhaust tips...add a couple of layers to make them stick out more.
I've also got a second layer for the Tonneau cover to raise it up more,
and I'll cut out the engine holes and mount a base plate from underneath to support the engine.
The Deora in my very first photo has no layering.
Its all just artwork.
|
|
|
|
Post by jffj on Apr 16, 2018 22:46:03 GMT -5
Yes, the 3D effect.
Thanks for the information.
I assumed that possibly you may have used a hidden partial layer to help form the arc in a side panel, such as a strip running front to back at the beltline on the inside of the side panel- that you could then "bend" the side panel over a bit to help "form" the arc "shape" of the side.
I also assumed that you are using some sort of "box" foundation that you form/fold your flattened artwork/model around to keep it square and braced, etc.
|
|
|
|
Post by dogfish7 on Apr 26, 2018 9:33:47 GMT -5
Very interesting. Wasn't aware they even made them.
|
|
|
|
Post by airdave on May 12, 2018 12:54:31 GMT -5
okay...back at it... in between other jobs, I have been working away at my Cartoons entries, so I'll do my best to catch you up. I have created two sets of side panels... one gets cut down to the raised portions and is glued to the main side panel. Then, I'll cut out the whole thing by hand.  You may notice my own Koolwheelz logo installed on the Deora! Three panels make up the main body...everything has been prescored. So once all are cut out, I have to carefully fold and shape the parts. Side panels just get one crease at the Cab shoulder. Center panel gets a whole bunch of folds. At this point I have also installed all the layering parts* on the center panel. Rear tailgate raised panel, raised rear exhaust panel, extra exhaust outlets, front grille and headlights, increased front bumper.  |
|
|
|
Post by airdave on May 12, 2018 13:02:24 GMT -5
Jumping ahead even more... I added a second Tonneau Coaver layer to create a raised edge and to increase the cut out for the Engine. (Half) Engine is built and sits in the cutout. I decided to stick with the basic scoop as was on the original Hot Wheels model, but I added a colour accent to match the body.  Apologies for not photographing the chassis assembly... its basically a very narrow "box", vertically shaped to fit into the body. Axles are simple wooden toothpick dowels (basically just to lock the ride height). Thats the only other material I will add, other than cardstock. Tires and wheels were the most work, since I decided to 3D everything. Not only did I increase the dimensions of the Wheels, but I deep-dished the Mags...and added bulged sidewalls to the tires. Once the Wheels are fitted to the chassis box, it is fitted into the body and the lower body flaps are glued into place (locking the chassis in).  |
|
|
|
Post by jffj on May 12, 2018 15:46:06 GMT -5
Awesome!
|
|
|
|
Post by TooOld on May 12, 2018 15:48:57 GMT -5
Wow this is really neat ! I like the way you are layering everything to get the 3D effect !  |
|
|
|
Post by airdave on May 13, 2018 18:00:56 GMT -5
crap!! I just saw the header...."Mild 2 Wild contest ends in 48 hours..."!!
LOL
I know, I know...it says 48 days. Not hours.
But I misread at first, and nearly lost my chair!
|
|
|
|
Post by TooOld on May 14, 2018 5:33:37 GMT -5
crap!! I just saw the header...."Mild 2 Wild contest ends in 48 hours..."!! LOL   BTW . . . check your messages (very top of the page ). Thanks ! |
|
|
|
Post by Fletch on May 16, 2018 15:40:37 GMT -5
This is so far out!
|
|
|
|
Post by airdave on May 16, 2018 16:01:34 GMT -5
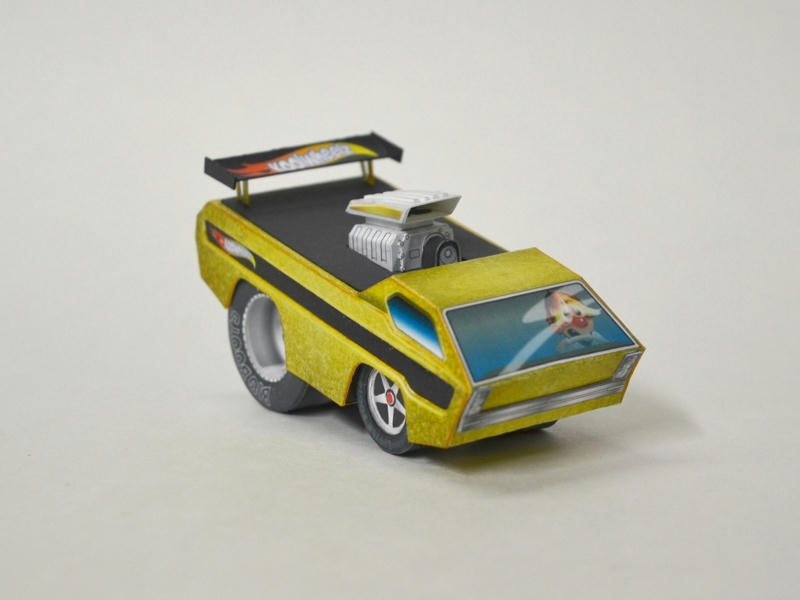
so, I finished the model itself...with the addition of the rear wing. but for the final contest photos, I need a stand or something I have an idea for a display base...so thats up next. For now, heres a couple of pics of the Deora itself. Keep in mind, this is only about 3" long. I'll have to take a "in hand" photo to show the scale.    |
|

