|
|
Post by sharp on Apr 6, 2019 12:25:34 GMT -5
Now that's the way a T bucket should look! Nice work Bob!
|
|
|
|
Post by wardster on Apr 6, 2019 13:08:14 GMT -5
Now that's the way a T bucket should look! Nice work Bob! "I'll second that motion!" Great stuff, sir! You mentioned being a bit under-whelmed with certain of the Weird-Ohs kit's "as molded" rather than "as drawn" parts. I get that. I think most of us here have thought along those lines, a time or three. I can even kind of see why Bill Campbell wasn't so thrilled with the collector's cards that someone else drew the images for, but, still ... they're fun. And it's a starting place, for those of who, over the years, picked up more scale modeling skills than The Young Versions Of Us once had. That's cool, too. Kind of fun, re-discovering those kits (and cards!) in a "flaws and all" state ... but deciding to have fun with them, anyway. :-) Silly question: was that a chunk of balsa foam I saw, as your (yellowish) master part, before you vacu-formed a plastic piece over top of it? (If so, whoo-hoo that I'm not the only one using that stuff for some "toon modeling" purposes!) And I'm thinking you used a Mattel brand of vacu-forming tool? (Judging by the dots around the edges of the vacc'ed plastic piece.) As for how to take some excess weight off of the driver's body ... just a suggestion, or two, along those lines; for whatever it might be worth. I've found that a person can use a kit's parts as a female mold, and can "glop" in either some mixed plaster-and-vermiculite ("P&V") and let that harden, and carve it to whatever shape you want ... hardening it further, later ... or do much the same with another material, such as "Magic Sculpt," that saves you the trouble of having to "further harden it" before you can move on ... or, depending on what a person's familiarity / comfort levels are, with various materials: use something like molded-then-carved-up P&V, which you can then coat in one of the epoxy putties, such as Magic Sculpt; or Aves brand "Apoxie Putty". But, like I said: that's all just possible suggestions. More visuals to show what I mean, more clearly, are over here: car-toons.proboards.com/post/14845/threadI didn't specifically show P&V being used as a "casting, made from a kit part's molds," but I've done some of it. (Like the head, cast into the helmet for an old, half-missing, gluebomb kit of the "Li'l Red Baron". I didn't take pictures of that work, since it's older stuff, and was sort of "more experimental than normal, even for me" kind of stuff, at the time. But the technique works. Like I said: that's all just suggestions, or food for thought. Whatever you end up doing, to "revamp" the driver figure, I look forward to seeing your well-known, often-tested, smile-inducing creativity and problem solving skills, on that issue! (EDIT -- I took one new photo, showing my experiments with the body and head of a "Leaky Boat Louie" Weird-Ohs kit, that will show people a sort of "intentionally worst case casting scenario, but which still would be usable" using Plaster and Vermiculite.) car-toons.proboards.com/post/14867/thread |
|
|
|
Post by TooOld on Apr 7, 2019 6:15:39 GMT -5
Now that's the way a T bucket should look! Nice work Bob! "I'll second that motion!" Great stuff, sir! Silly question: was that a chunk of balsa foam I saw, as your (yellowish) master part, before you vacu-formed a plastic piece over top of it? Thanks Ward ! That's some very very dense foam used by sign makers , it's actually machinable but I just use good old files and Xacto knives . I do have some Balsa Foam but it's too soft for Vac-U-Forming . I've also got a sheet of 2" thick polyurethane foam left from my fiberglass days that I use more often than the Balsa Foam . It's much stronger and isn't easily damaged and it sands very easy , but it's very very messy .  The sign foam came from this place . A couple of years ago I requested some free samples but I never have bought any . signfoam.com/ |
|
|
|
Post by wardster on Apr 7, 2019 23:32:53 GMT -5
> "... but it's very very messy" Heehee. Well, as Big Daddy used to say: "Big Mess, Big Success!" Thanks a bunch for that info. I took a quick look over at the sign foam place, and bookmarked it, to check out in more depth, later. Also bookmarked their book, called "Mastering the Art of Dimensional Signmaking: the sign-foam how-to handbook". I'm always (emotionally) up for books ... even if my wallet drops hints like, "Uh, dude, don't you think the half-a-dozen sculpting books you ordered have this month covered?!"  Just throwing this out there, for "whoever's listening," and for what it's worth, but this place ... www.freemansupply.com/has several different reasonably priced (I thought, anyway: compared to industry norms) sample kits of various forms of things like Renshape (pattern maker's material, in different densities) with this kit being one that I got from them a few years ago: www.freemansupply.com/products/sample-kits/machinable-media-sample-kitAs they note on that web page, they only do that special offer once per customer ... but I really liked their kit's included DVD (nice addition to my ever-growing how-to DVD library) and I am still using up (albeit quite sparingly) the various types of sample materials I picked up, for various projects. Usually, stuff like Renshape is WAY out of my price bracket (and comes in huge blocks / sizes I likely shall never need); but the "sample sizes" (and thus "prices"!) sure have worked fine for me! I kind of save the fancy stuff for when I feel I really need it, and I get by with various of the way-cheaper materials, most times. It sounds like you do that, too ... which is cool to note. Thanks again for telling me ("us"!) about that Sign Foam place ... I'll definitely give it a good look! |
|
|
|
Post by TooOld on Apr 8, 2019 7:08:29 GMT -5
|
|
|
|
Post by Fletch on Apr 8, 2019 8:22:14 GMT -5
That eye gone wild motor sure fits in there good doesn't it. Cool!
|
|
|
|
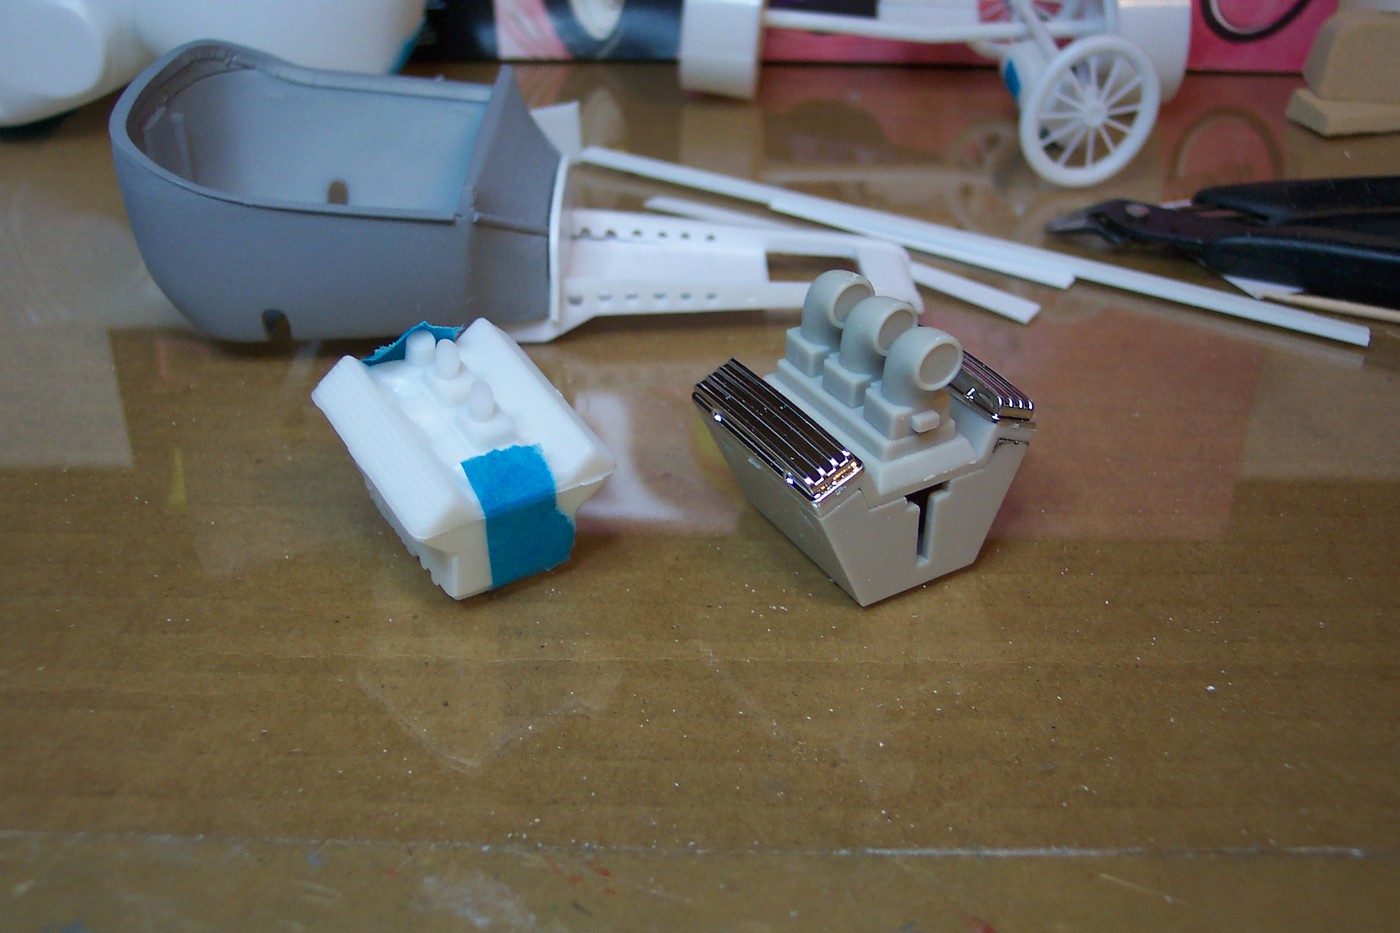
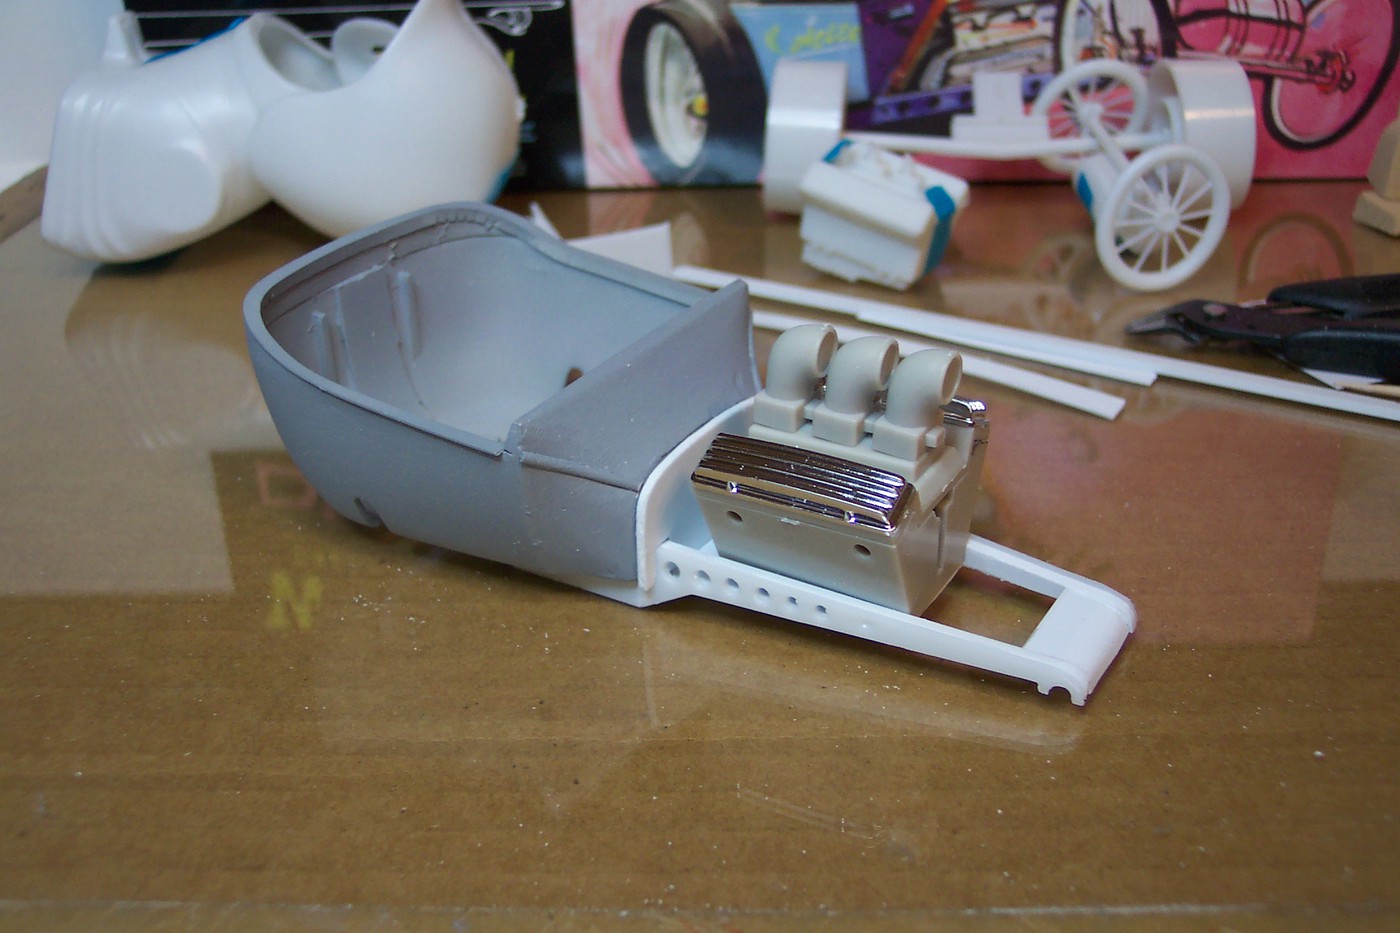
Post by TooOld on Apr 13, 2019 8:20:33 GMT -5
That eye gone wild motor sure fits in there good doesn't it. Cool! Thanks Fletch ! Finished up the frame by adding a new front axle . 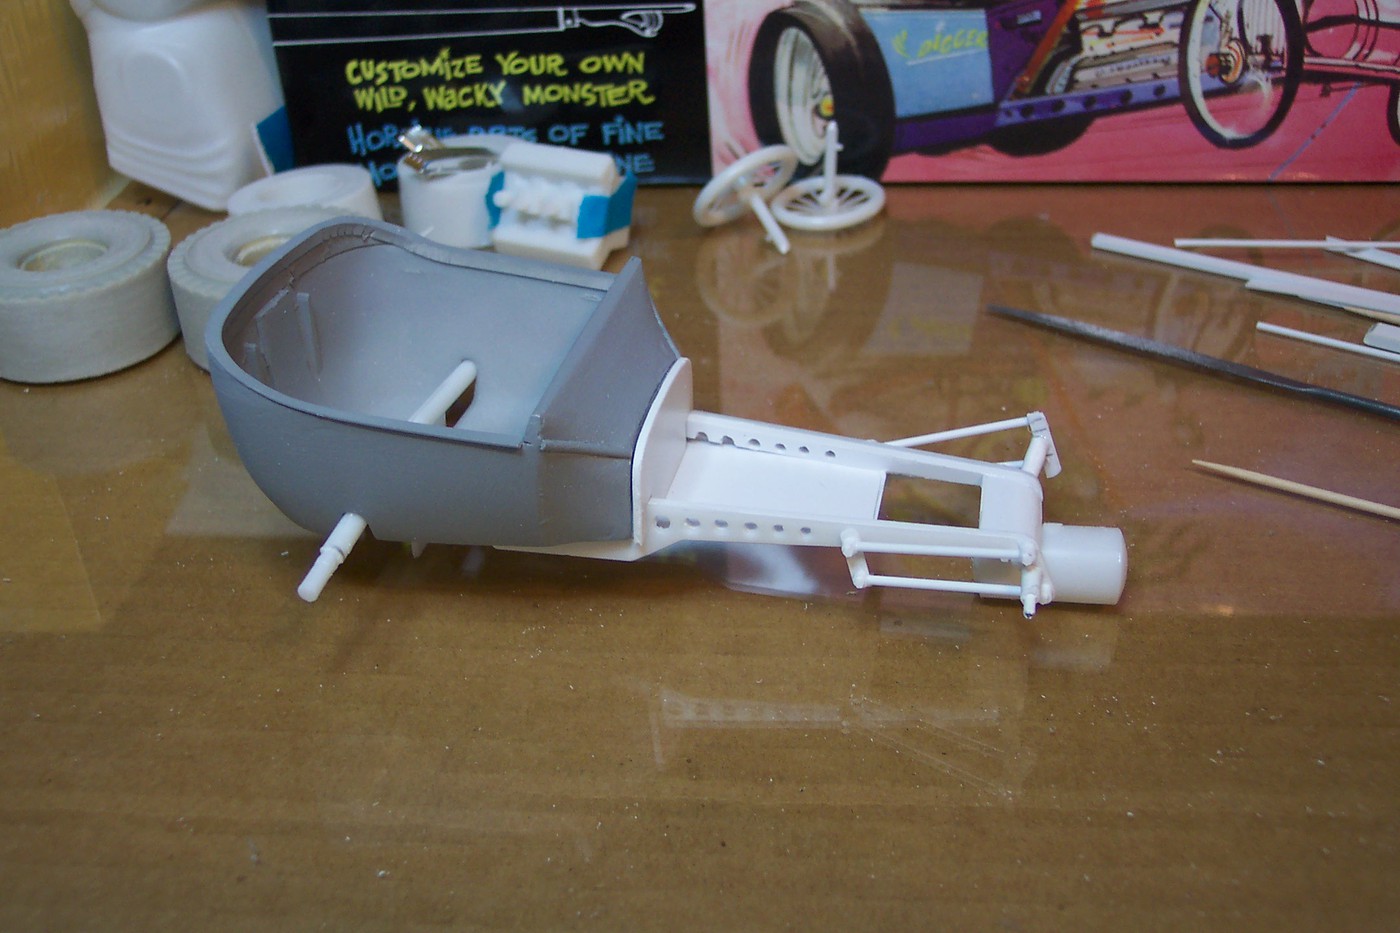 I picked up these tires on ebay last month and they'll work perfect for Digger ! First step is to cut them apart with a razor saw then clean up the centers and remove the lettering . I have some wheels that should fit I just have to find them !  I did find these wheel backs that fit with a little persuasion .  And I started on the engine by opening up the scoops and adding a few goodies . Also made up the Moon Tank . 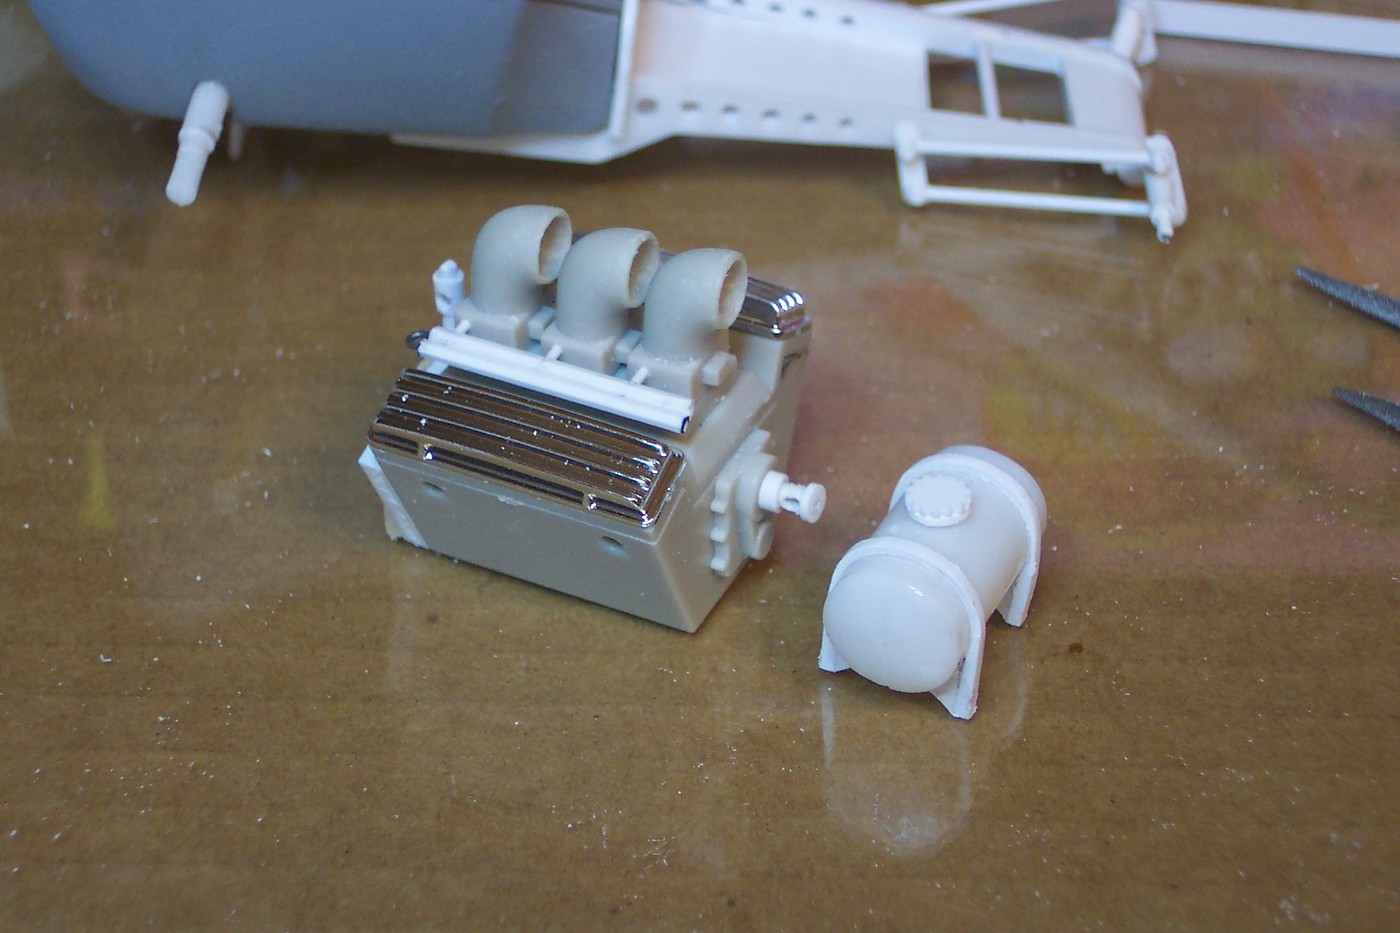 |
|
|
|
Post by sharp on Apr 13, 2019 20:21:15 GMT -5
That bucket is looking great!!
|
|
|
|
Post by wardster on Apr 17, 2019 0:58:02 GMT -5
Digger is gonna be emulating Endsville Eddie, with all that added torque and horsepower (and "Toon Realism") you're throwing his way! Coolness!
|
|
|
|
Post by Starryeyes on Apr 18, 2019 6:58:02 GMT -5
Your selection of goodies is coming together nicely Bob! All the little extras are just adding to the cool factor 🤘
|
|
|
|
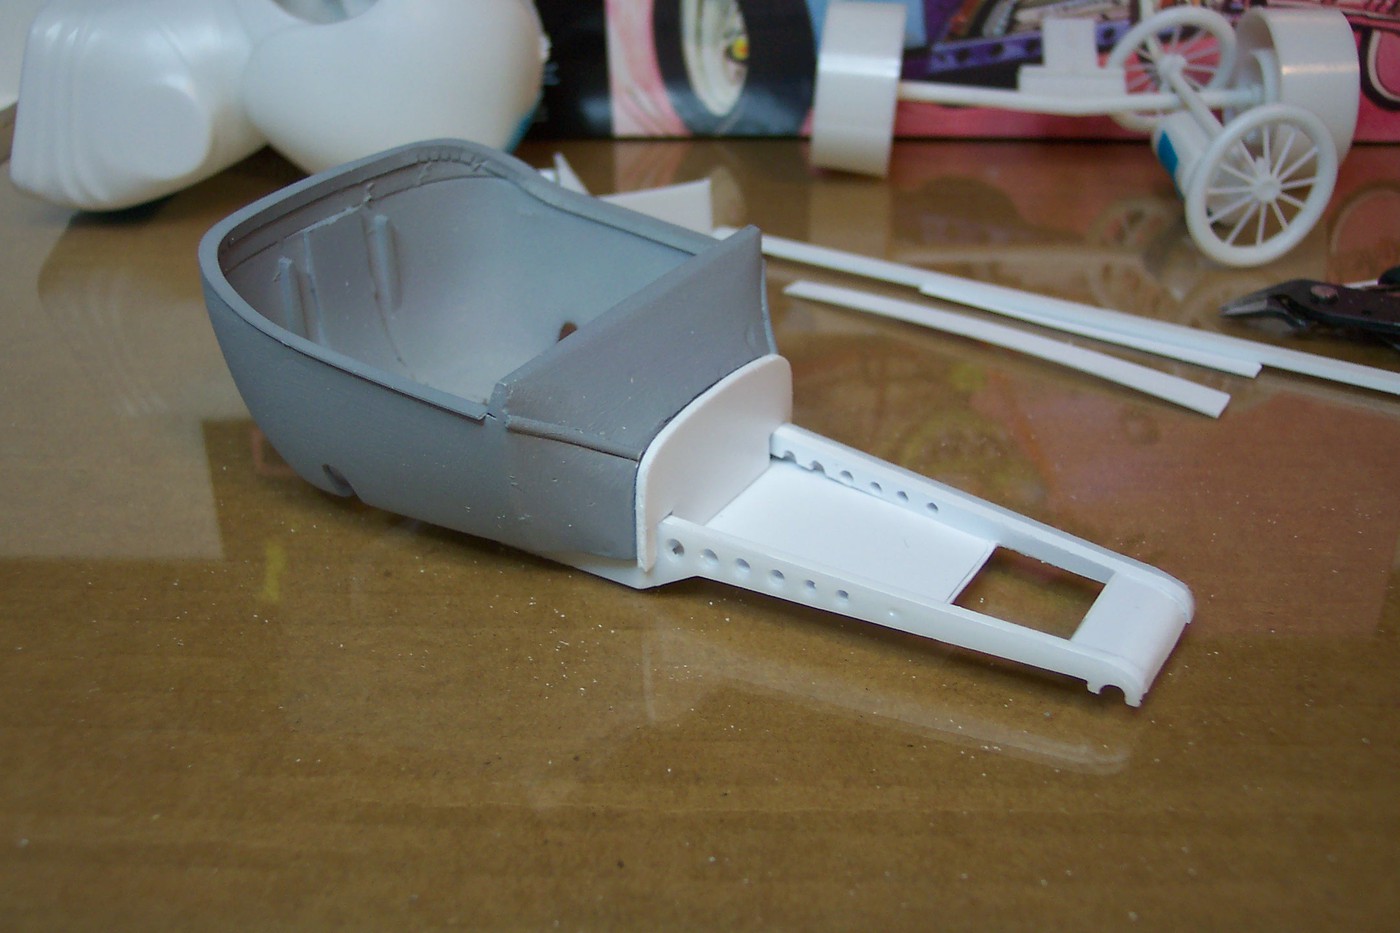
Post by TooOld on Apr 19, 2019 8:50:07 GMT -5
Thanks guys ! Time to start in Digger himself . With the narrowed T-Bucket Digger needs to shrink a bit to fit . Cutting a slice out will do it (slightly tapered towards the bottom to fit). 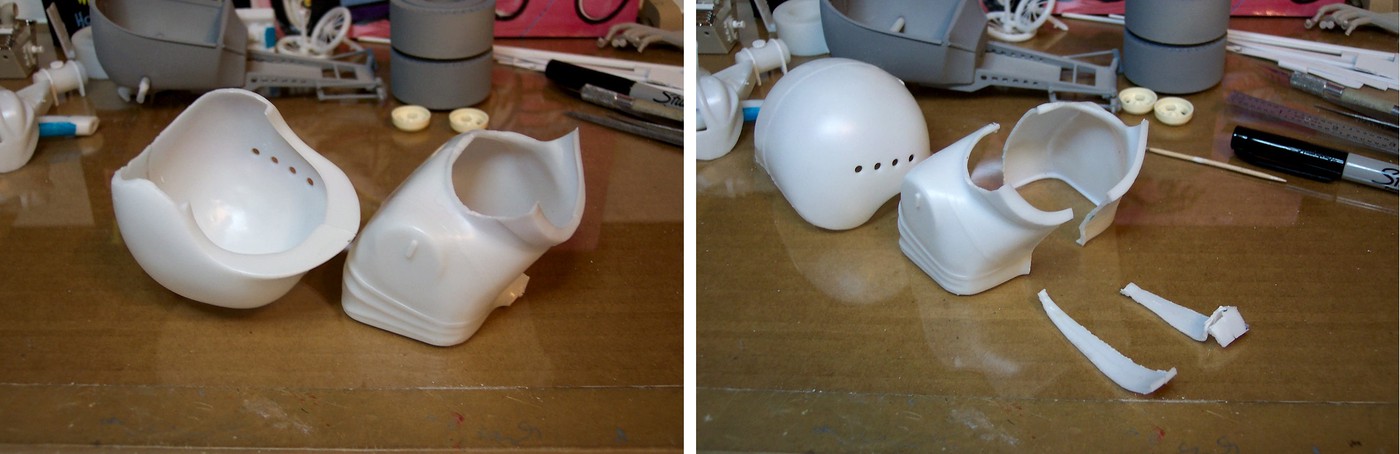 I shaped a chunk of polyurethane foam for a base and sprayed it flat black , this also keeps it from shedding 'cause this foam can get messy ! The idea is get Digger down into the bucket instead of sitting in top like he is out of the box . 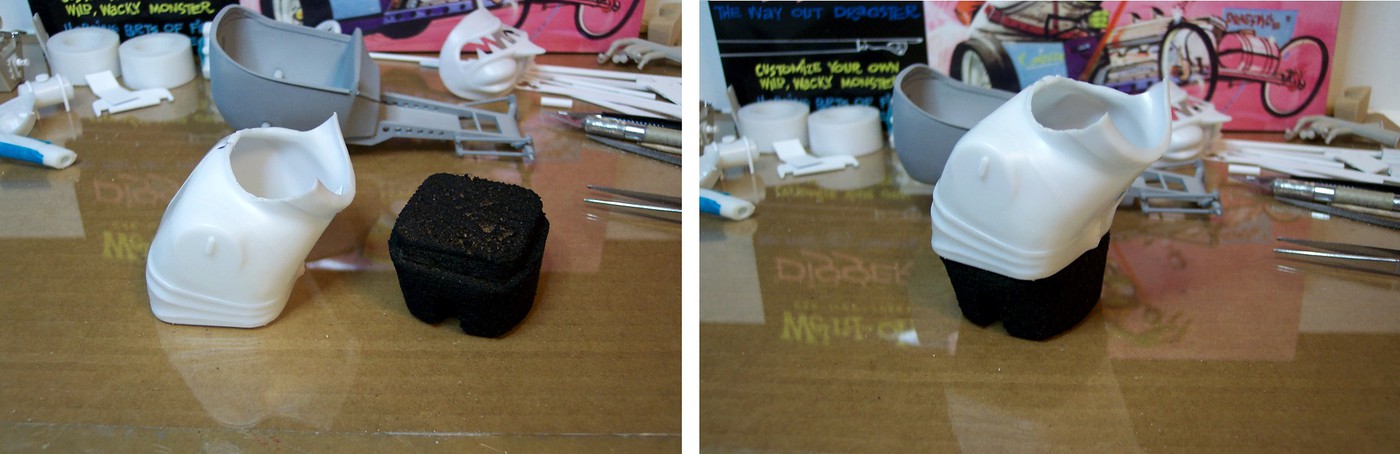 When attaching the arm I wanted to angle it out to the original position and also to blend the base into the body more . Some filler should create a smooth transition . 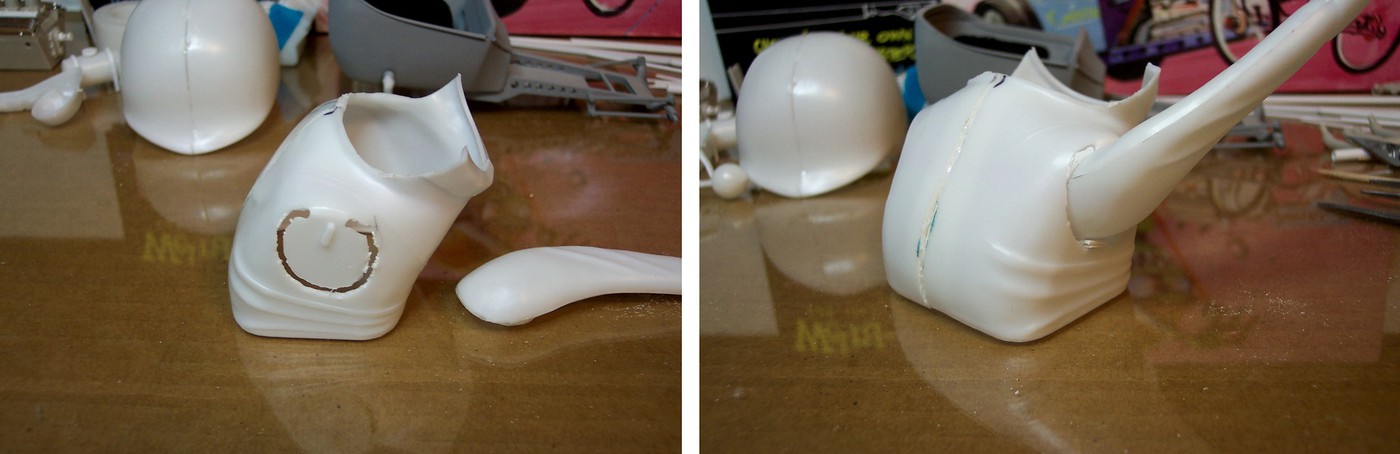 Now for Digger's face . He needs to look more sinister instead of happy so his eyes need to go ! With no eyes it looks like a Halloween mask . . . hmmmmmm . . . that's an idea .  I used Apoxie Sculpt to make new eyes . Closer together and rounded on the outer corners , plus a new eyebrow . 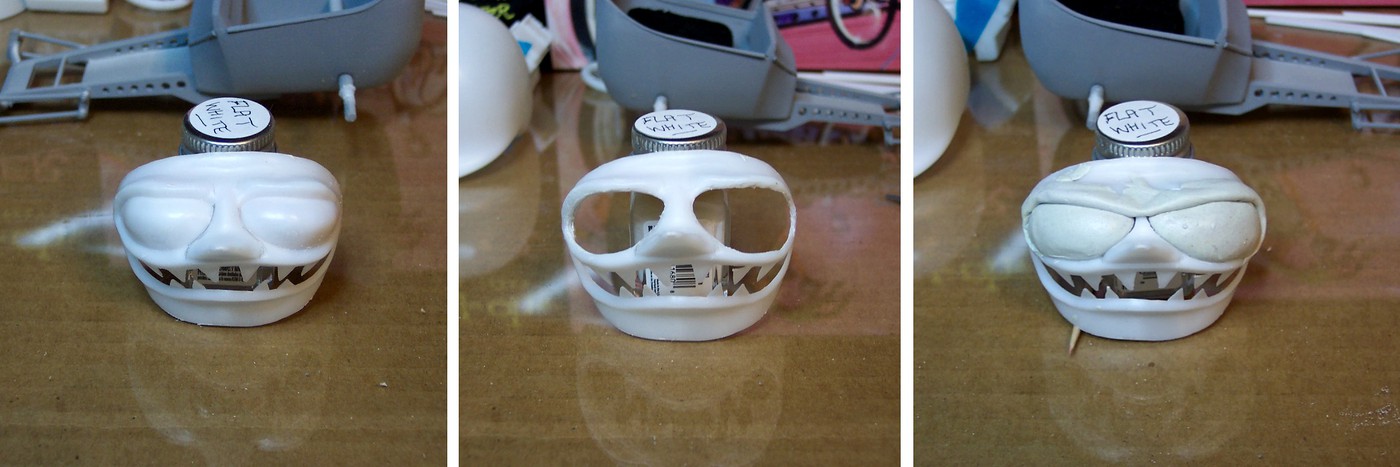 His new eyes are bigger than I had planned but once it's cleaned up and painted it should be okay . |
|
|
|
Post by Starryeyes on Apr 19, 2019 20:07:48 GMT -5
Bringing all the details together ! I can here your gears turning from here Bob !! He looks swell !
|
|
|
|
Post by TooOld on Apr 27, 2019 10:13:52 GMT -5
Another week gone but I'm feeling better about my chances of finishing in time . Fitting the helmet and face back onto the narrowed body was much more involved than I expected . Still need to fill in some gaps but it's about there . 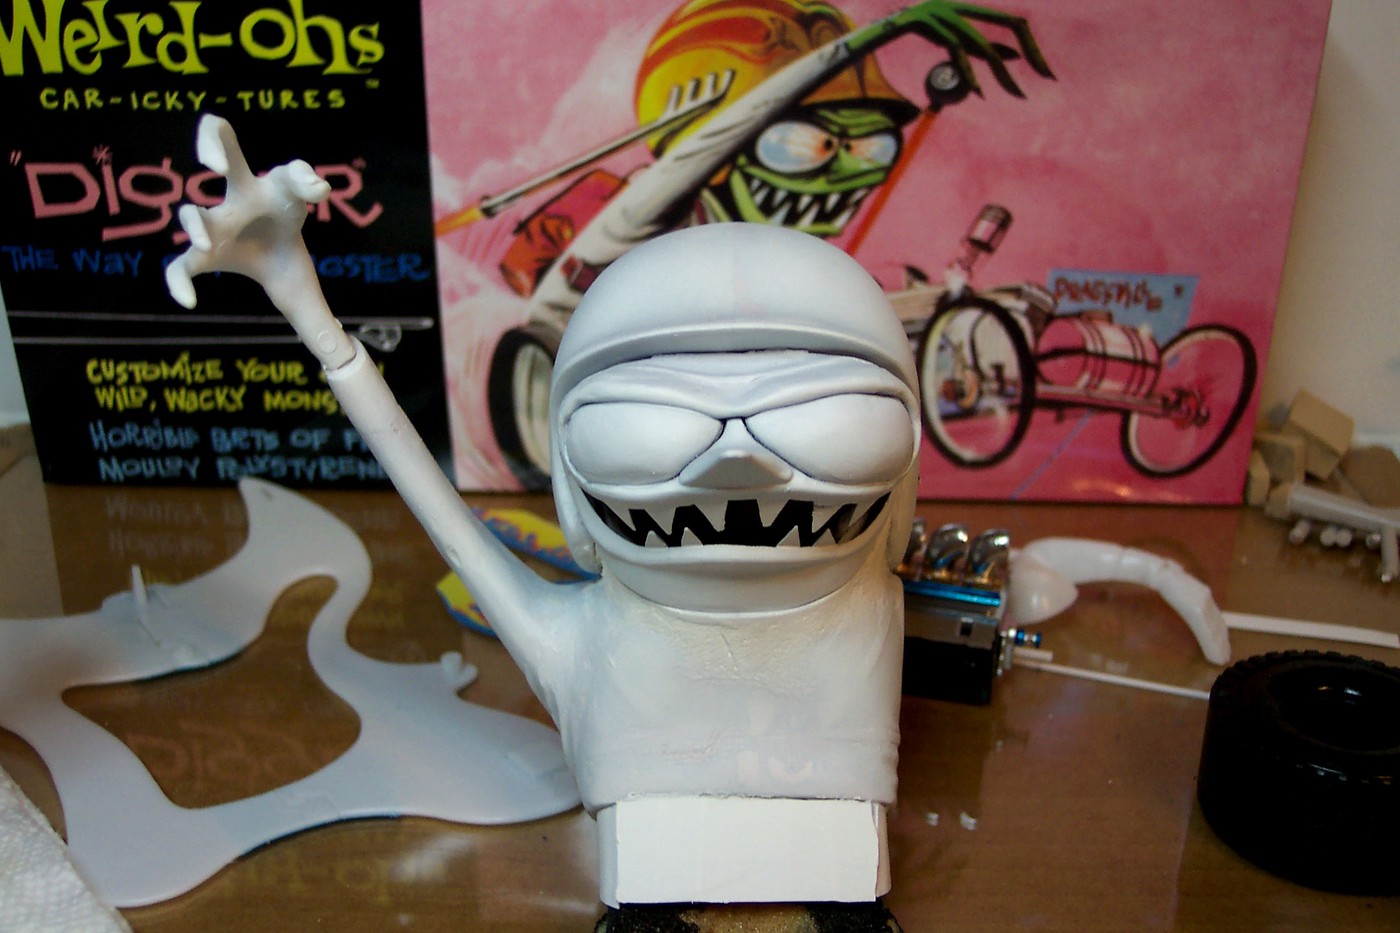 The only blue paint I had was from my Little Drag build so I figured Digger's "T" needed some flames too ! 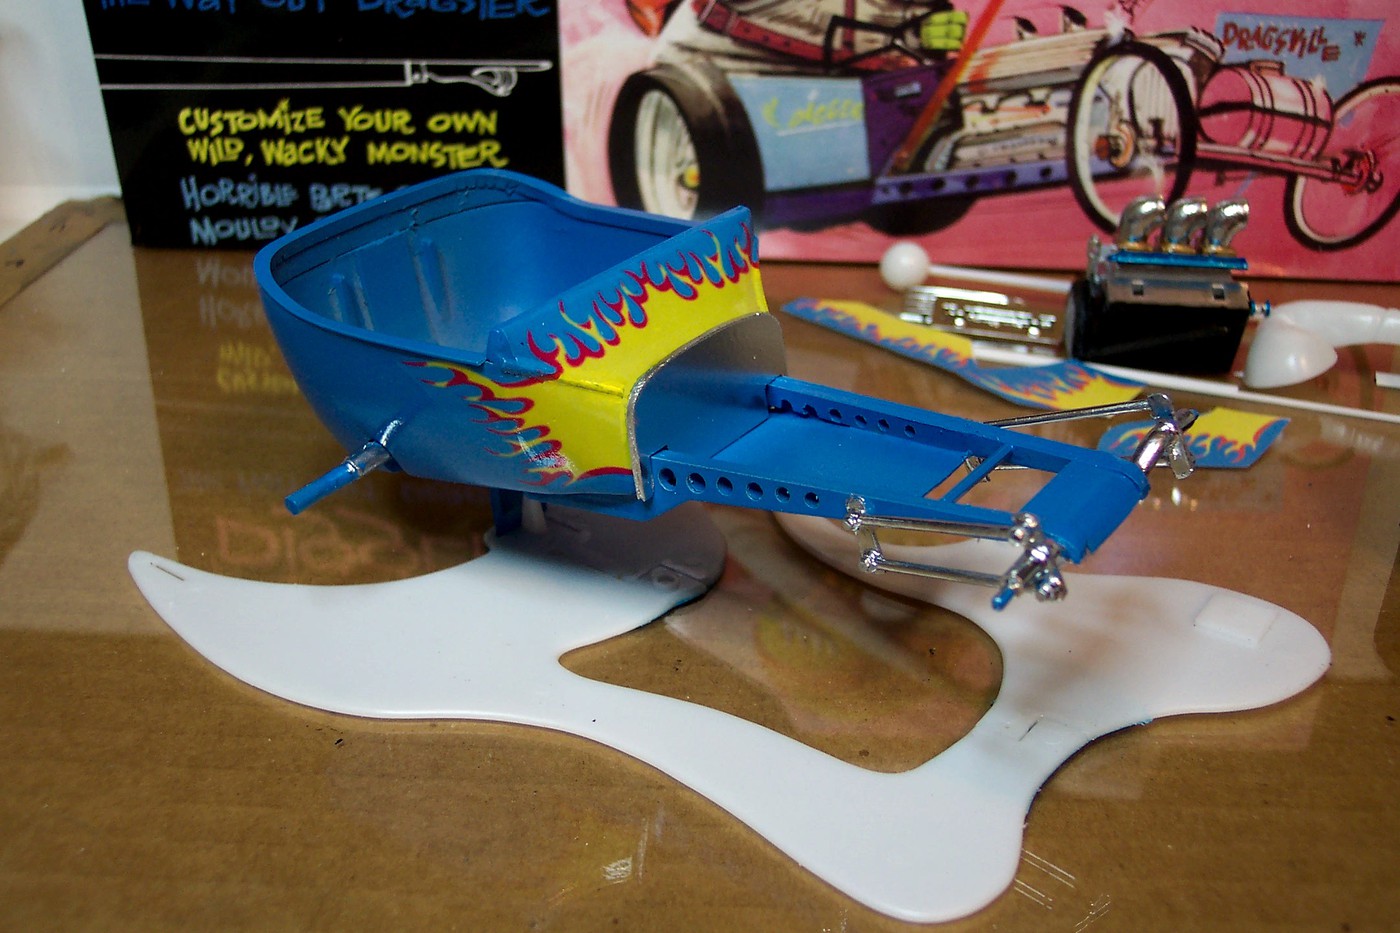 And here's Digger trying out his new ride . 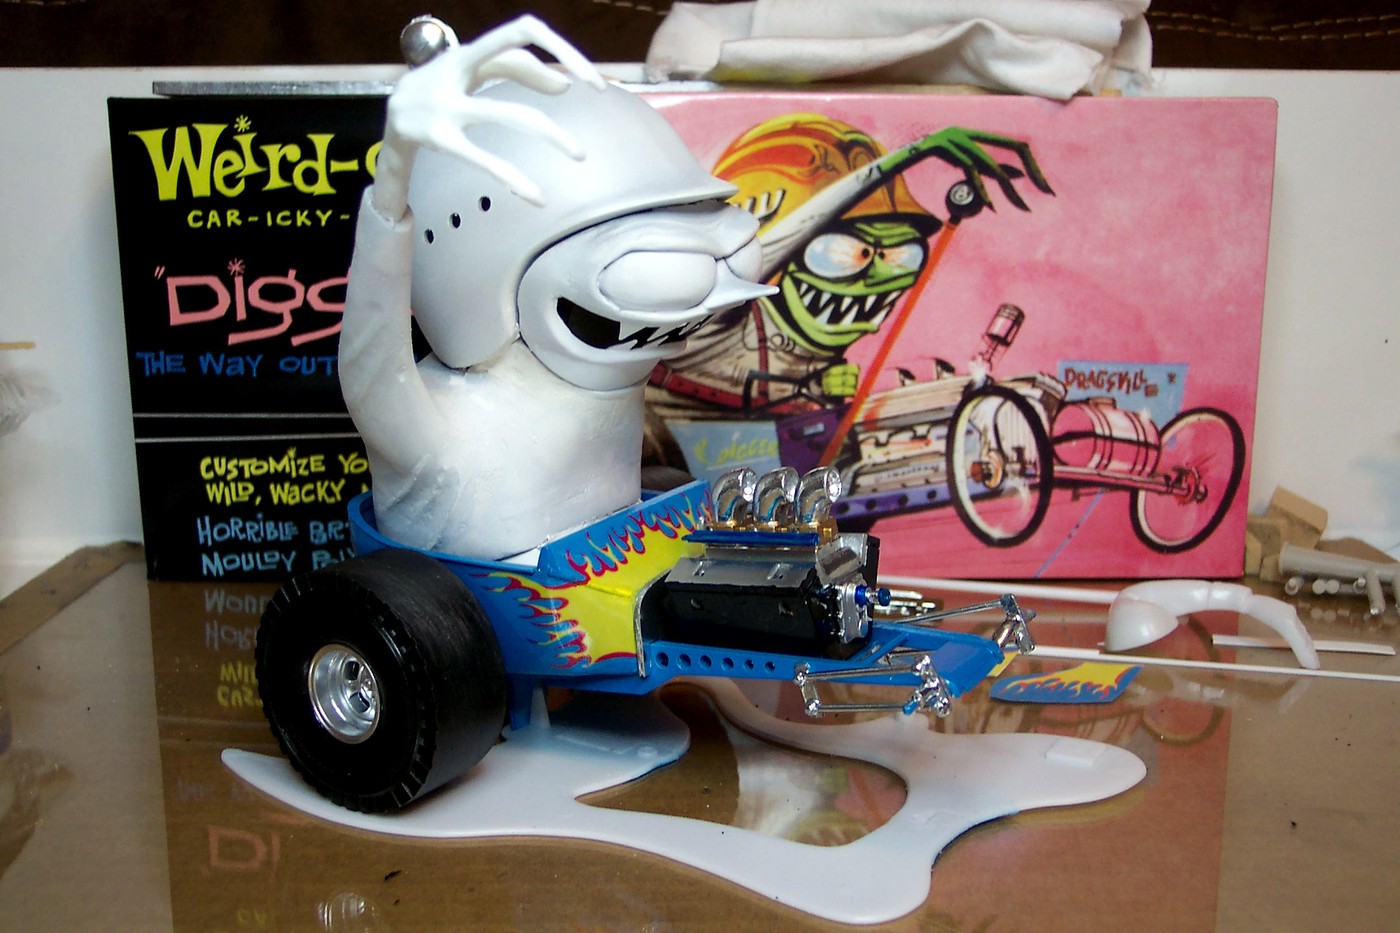 I need to add some details to his driving suit and fab up a parachute . . . oh yeah his other arm is still missing . That and some headers are all that's left . . . along with a few little details here and there . |
|
|
|
Post by Fletch on Apr 27, 2019 16:07:44 GMT -5
Diggin' Digger!
|
|
|
|
Post by sharp on Apr 27, 2019 18:36:42 GMT -5
Looks great Bob!! love that old skool flame job!!
|
|


 I did find these wheel backs that fit with a little persuasion .

