|
|
Post by Megacurve on Nov 2, 2020 18:46:31 GMT -5
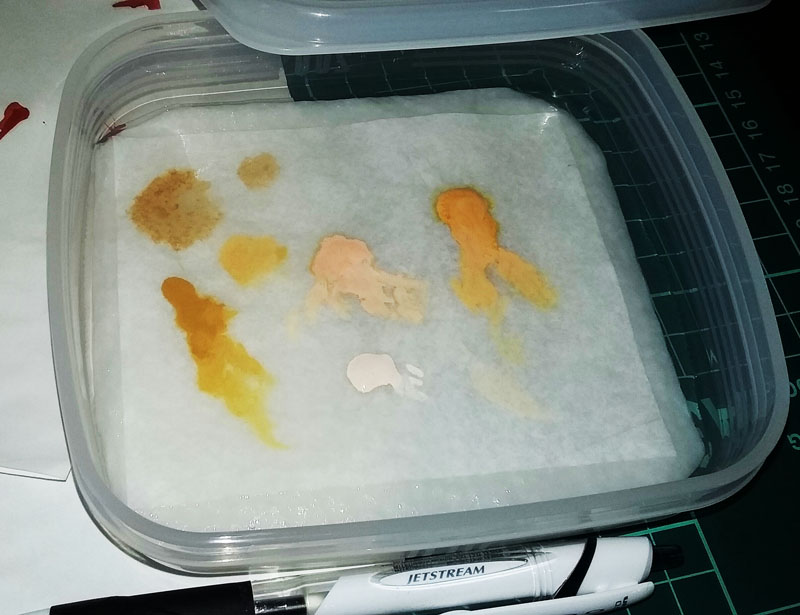
My Wet Palette:  The wet palette is a small Tupperware container, a piece of kitchen paper towel to hold the water and a piece of BAKING PAPER /PARCHMENT PAPER. My container is about 5.5” x 5” x 1.5” . I bought 2 for 100yen. The paper towel is folded twice and the corners cut off, and water added so just it is water logged. The waxy PARCHMENT PAPER is cut a little smaller and put on top. You put your paints on that and can mix ‘em to make color graduations and they stay usable for days when you put the lid on. |
|
|
|
Post by jcon on Nov 2, 2020 19:42:07 GMT -5
I do that same thing!!! Works well for figure painting...
|
|
|
|
Post by TooOld on Nov 3, 2020 9:21:04 GMT -5
Well I feel like a dummy . . . always wondered what a wet palette was .  |
|
|
|
Post by Megacurve on Nov 3, 2020 19:57:53 GMT -5
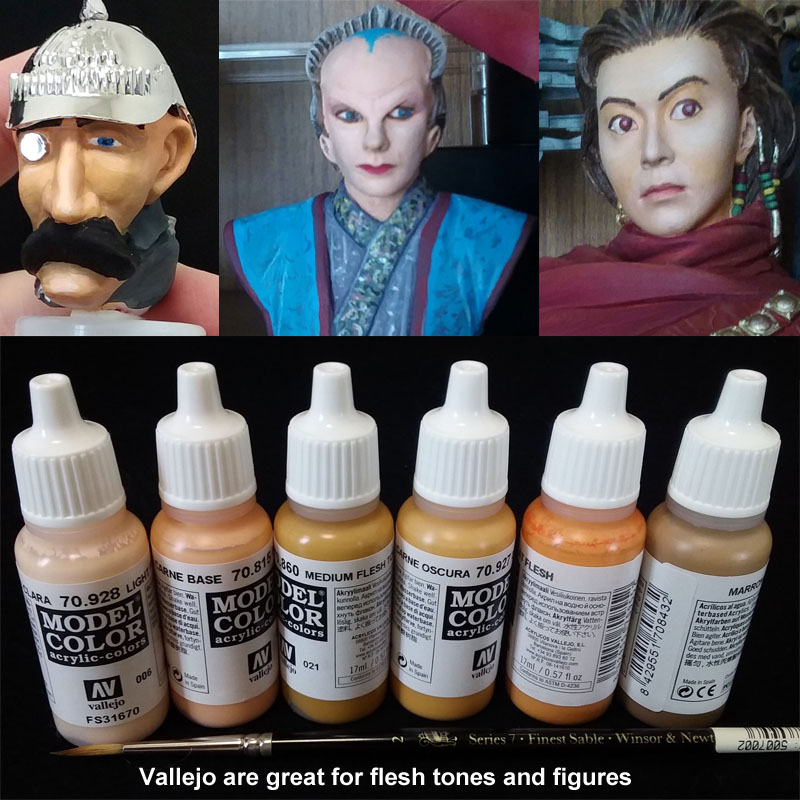
Vallejo acrylics and the wet palette are useful for the figure side of things. Painting the face and clothing as you need lots of slightly different shades. Good for leather too.  |
|
|
|
Post by wardster on Nov 4, 2020 16:41:06 GMT -5
The wet palette is a small Tupperware container, a piece of kitchen paper towel to hold the water and a piece of BAKING PAPER /PARCHMENT PAPER. My container is about 5.5” x 5” x 1.5” . I bought 2 for 100yen. The paper towel is folded twice and the corners cut off, and water added so just it is water logged. The waxy PARCHMENT PAPER is cut a little smaller and put on top. You put your paints on that and can mix ‘em to make color graduations; and they stay usable for days when you put the lid on. Thanks for posting that info! I'm glad other guys here are seeing that "tool" since it's such a good one to have around, for use in conjunction with true "water based" acrylic paints. (Vallejo's paint is fine; I personally like the stuff I have from Reaper Miniatures, as well. I'm not sure Tamiya's acrylics would work with this: because they use a very specific non-water thinner or reducer. But it might work with those paints, if a person used this same basic idea, but used that thinner instead of water?) For other guy's benefit, I'd like to kick some ideas around, as to what people here (who use these tools) have gotten away with, in terms of the materials used. It amazes me how wide a person can go, in using various materials. This is a really cool painting tool, that can be as simple or as picky-and-complicated as a person wanted to go, with it. To get things started: I recently had really good luck with a two-part or two-layer "sponge" stage (just under the parchment paper) with the lower stage of the "sponge" being made out of a really cheap "artificial chamois" originally made for wiping cars down, after washing them. (I also tried a real chamois, and it did not work well at all. It wrinkled like crazy, and seemed to be damaged by the continual moisture, and so on.) The stuff that worked was almost a felt-like material, so I think felt, itself, would probably work fine as the lower layer of the "sponge" portion. I haven't tried that, though, but it seems to make sense. If it does work, white felt should work really well. For a second sponge-like layer above that, I recently tried several layers of fabric from a white t-shirt. It worked really well. I actually bought some brand-new white t-shirts, just for that purpose. To talk about the intent: the lower layer holds a lot of water, and lets new water (if you need to add any, at some point) get up into the upper layer without any problems. The white t-shirt fabric made the "background color" of the palette itself close to white, which might be a good thing, visually, for seeing what paint hues and shades you have mixed. (The one-dollar "artificial chamois" lower layer I was using was a bright orange, which was distracting, seeing it through the layer of parchment paper -- especially if a person was trying to mix up colors to simulate most skin tones, or even wood types. There is also a liquid product I'm experimenting with, by Liquitex, called "Palette Wetting Spray". My experience is that it works great UNDER the parchment layer, or around the bare edges (where any new water gets added, over time), but if sprayed on top of that upper-most layer, in my experience, it's not great. It is probably made more for use with heavy-bodied acrylics (the stuff that comes in a really thick, almost gel form) -- or so it seemed to me, anyway. For really thin paints like Reapers or Vallejo's, I'd keep it under the parchment layer. Used there, it seems to keep mold growth from happening, if you leave the paint enclosed in your container for long times. I've found that five days is about the limit for keeping mold away, in a totally airtight container, without something added, to control mold growth. It seems to be a worthwhile (but optional) thing to add, or to play with, if (like me) a person is prone to experimenting with processes or materials that they find useful. The video links I posted, somewhere else (the tips and tricks section, I think) showed other people trying copper wire, as a way to keep mold growth down. (I think it was copper wire? Been a while since I watched Vince Venturella's many painting videos!) For a container, I have gotten away with a bunch of different things. The stuff like the ones seen here, of course. I had some metal tins with lids that were really shallow, from AOL, from back in the days when floppy discs were still valid for computer usage. Those worked fine. I could keep paint wet and workable for days and days, with that set of tins plus the wetting spray. Or: I had some around, and I was curious about using a long-and-skinny plastic container for kid's style of watercolor paints. Those containers don't seal air out, super well, which is partly why I tried it. I found it still kept paint wet for a couple of days, before it started to let in enough air that the parchment wrinkled up and the paint was drying, if you didn't add new water. To keep the paper straight, and perfectly wrinkle-free: before I put any paint on the parchment, I found that getting it saturated with water by sitting it (outside of the container) between a few wet layers of fabric-style towels, worked really well. It is sort of like making a sandwich: towels, paper, towels. And just let it sit, for a while, like that. Other methods of doing the initial wetting ends up (for me, anyway) with wrinkles, and curled edges. Any other tips out there, on materials or ways to use them? I'm a big fan of this incredibly handy painting tool, so I figured I'd ask, in case other guys have discovered something really cool. |
|
|
|
Post by Megacurve on Nov 4, 2020 23:08:00 GMT -5
Tamiya's acrylics, even using their retarder, are still terrible for brush painting. I am guessing the formula is different now as I used to paint Tamiya acrylics with a brush, using water much of the time and it didn't dry so fast back then.
|
|
|
|
Post by wardster on Nov 5, 2020 3:45:05 GMT -5
Tamiya's acrylics, even using their retarder, are still terrible for brush painting. I am guessing the formula is different now as I used to paint Tamiya acrylics with a brush, using water much of the time and it didn't dry so fast back then. Yeah, I'll take Reaper's or Vallejo's true (water-based) acrylics over Tamiya's, any day, for hand brushing. But I do use Tamiya's for airbrush work, and like them, for that. And I'll take Tamiya's "acrylic" paints over the old square bottle Testors' enamel paints, for hand-brushing, any day! One of my many experiments, a month or three ago, involved some of the square-bottle enamel metallics. How I put up with that nonsense when I was a much younger person, is beyond me, now!? I quickly remembered the "rule" about having to wrap any bottle you were trying to shake up, in a rag, so it didn't go all over the place, due to the lids that never wanted to seal correctly, no matter how well I thought I had cleaned the threads. Ugh!? |
|

