|
|
Post by Starryeyes on Jul 22, 2015 20:07:29 GMT -5
Heck after reviewing my OWN photos,I see room for improvement on working my additional lighting over my desk.. The hanging cord looks unkept so I'll be adding a poster box and cleaning up th overhead light !!
|
|
|
|
Post by wardster on Jul 29, 2015 16:38:13 GMT -5
Nothing new to show from me, photo-wise, on my "bedroom window / new work bench" project ... or for that matter, regarding the work I'll be doing later, to build myself a new "light box" (made from discarded solar panel's metal frames and some throw-away tempered glass") ... BUT ... I'm in serious Overload Mode, as far as all of the workbench and workshop books I'm reading. Picking up great "steal-able" ideas, left and right! I'm sure that, down the road, I'll have some info to share that others might like, about what I'm reading. One of the cool ideas I've seen in those books, but have not yet done anything with, is the idea behind a "torsion box" -- which I'll probably explore further, later, in regards to the main work surface in my secondary work area. Wikipedia's explanation isn't really what I'm thinking of ... en.wikipedia.org/wiki/Torsion_box... and this link doesn't totally explain what I'm thinking, or relate specifically to me, either ... www.wikihow.com/Build-a-Torsion-Box-Workbench-Top... but it's just something I'm diggin' as far as the raw idea goes. It's mainly a way to use physics to keep a work surface dead flat, and to make it really resistant to bending and sagging under pressure or weight and what not ... while also keeping the total weight of the working surface at a reasonable level. As I'm understanding the principles, it's two surfaces (upper and lower) running parallel to one another, with a middle layer that keeps those two other layers apart from one another, at a specific / constant difference. When pressure is applied to one layer, it wants to bend; and force gets applied from that layer towards the middle layer ... but the opposing layer "resists," because it can't bend at the same curvature. Think of looking at a cross section of an onion, with one layer right on top of another. If you were to split those layers apart, the curvature of each would be slightly different. The ones closest to an imaginary center (or the imaginary onion) are shaped like a "small circle" (in cross section) but the farther you get from that imaginary center, the more of a "big circle" the shape would have to bend itself into, to match what the other layer is doing, bend-wise. So, in short, any bend or sag or whatever in one of the outer layers is "fought against" by the layers on the other side. Done right, surfaces set up with that three-layered approach are supposed to be highly resistant to being anything but flat. Where the idea applies to my situation is that my working surface in that secondary area could use reinforcing in some manor, since right now it's slightly-warped-to-begin-with, used-and-abused plywood ... and once I get farther along with re-doing the next-to-hopeless garage, I'll get back to that work surface and improve it any way I can. Meanwhile, as I work on the garage and what not, I'm "thinking" about what's next in the secondary / bedroom work area ... and sorta bouncing between projects, to have thinkin' time. Thinkin' time is important! We gotta have some sort of a plan ... and thinkin' time helps to make plans! |
|
|
|
Post by Starryeyes on Jul 30, 2015 19:37:50 GMT -5
Nothing new to show from me, photo-wise, on my "bedroom window / new work bench" project ... or for that matter, regarding the work I'll be doing later, to build myself a new "light box" (made from discarded solar panel's metal frames and some throw-away tempered glass") ... BUT ... I'm in serious Overload Mode, as far as all of the workbench and workshop books I'm reading. Picking up great "steal-able" ideas, left and right! I'm sure that, down the road, I'll have some info to share that others might like, about what I'm reading. One of the cool ideas I've seen in those books, but have not yet done anything with, is the idea behind a "torsion box" -- which I'll probably explore further, later, in regards to the main work surface in my secondary work area. Wikipedia's explanation isn't really what I'm thinking of ... en.wikipedia.org/wiki/Torsion_box... and this link doesn't totally explain what I'm thinking, or relate specifically to me, either ... www.wikihow.com/Build-a-Torsion-Box-Workbench-Top... but it's just something I'm diggin' as far as the raw idea goes. It's mainly a way to use physics to keep a work surface dead flat, and to make it really resistant to bending and sagging under pressure or weight and what not ... while also keeping the total weight of the working surface at a reasonable level. As I'm understanding the principles, it's two surfaces (upper and lower) running parallel to one another, with a middle layer that keeps those two other layers apart from one another, at a specific / constant difference. When pressure is applied to one layer, it wants to bend; and force gets applied from that layer towards the middle layer ... but the opposing layer "resists," because it can't bend at the same curvature. Think of looking at a cross section of an onion, with one layer right on top of another. If you were to split those layers apart, the curvature of each would be slightly different. The ones closest to an imaginary center (or the imaginary onion) are shaped like a "small circle" (in cross section) but the farther you get from that imaginary center, the more of a "big circle" the shape would have to bend itself into, to match what the other layer is doing, bend-wise. So, in short, any bend or sag or whatever in one of the outer layers is "fought against" by the layers on the other side. Done right, surfaces set up with that three-layered approach are supposed to be highly resistant to being anything but flat. Where the idea applies to my situation is that my working surface in that secondary area could use reinforcing in some manor, since right now it's slightly-warped-to-begin-with, used-and-abused plywood ... and once I get farther along with re-doing the next-to-hopeless garage, I'll get back to that work surface and improve it any way I can. Meanwhile, as I work on the garage and what not, I'm "thinking" about what's next in the secondary / bedroom work area ... and sorta bouncing between projects, to have thinkin' time. Thinkin' time is important! We gotta have some sort of a plan ... and thinkin' time helps to make plans! Wardster my brother !!! Back away from the reading material ... now INHALE....EXHALE......INHALE....EXHALE... feeling better ?? Ok.. Now bust out a kit and treat yourself to some modeling fun.... I've got lots of changes yet to make in my modeling room yet this year but they need to be done in moderation...lol....Lol....  you're cracking me up (in a good way) old buddy |
|
|
|
Post by wardster on Jul 30, 2015 22:02:11 GMT -5
Wardster my brother !!! Back away from the reading material ... now INHALE....EXHALE......INHALE....EXHALE... feeling better ?? Ok.. Now bust out a kit and treat yourself to some modeling fun.... I've got lots of changes yet to make in my modeling room yet this year but they need to be done in moderation...lol....Lol....  you're cracking me up (in a good way) old buddy Heehee! Yeah, I can totally understand that point of view. But while I understand where you're coming from, I'm gonna keep on with what I'm doing. Several reasons. One is simply that it's years and years overdue! And life ain't forever! And most importantly -- once the various upgrades to various areas are farther along, I'll be able to do a LOT more than I ever could have, before -- (which is highly motivating, in itself!) -- so, as I see it, it's all to the good! And besides, all of my various working areas are simultaneously in such a state of advanced disarray that working on a kit ain't likely, for the time being. I'd have to clean up at least one of the working areas, enough to do that ... which will happen, in due time ... but for now, I need to keep on keeping on. Winter weather is around the corner, figuratively speaking ... and I want a lot of the upgrades done before that period kicks in. Come winter, or even mid-fall, I'll hopefully have the upgrades done. Then ... it'll be time for me to break open some kit boxes, and just sit and relax with them! Meanwhile, though ... from a certain point of view, breaking out a bunch of carpentry tools and what not, and attacking a really old, really Bare Bones, really neglected garage (for example) is, in a sense, just playing with a really big kit.  EDIT -- On second thought, after typing the info above, it sounded a bit much to have all three potential work areas so cluttered up that I could not use any of them. Granted, one's not really majorly usable at all, for multiple other reasons -- (the garage) -- and one's still very much a messy work in progress (the bedroom bench or desk surface's area) ... but upon reflection, what's keeping me from decluttering at least one indoors work area (the one that used to be my only working area) and putting that to some relaxing use, now and again ... while I also keep working on the other two areas; as time allows? So, with that thought, I took the evening off from any serious work on getting organizee elsewhere, or reading, or planning, or what not ... and just straightened up my upstairs work area. "Just in case" I get into a mood to blow off the other stuff, for an evening or something, mind you. To do what you said, Chuck, and just play with a model kit or something, just to be doing it. (Even if, in the long run, the main priority still has to be for me to get those other two areas up and running, before cold sets in!) |
|
|
|
Post by TooOld on Aug 3, 2015 10:51:44 GMT -5
Wardster my brother !!! Back away from the reading material ... now INHALE....EXHALE......INHALE....EXHALE... feeling better ?? Ok.. Now bust out a kit and treat yourself to some modeling fun.... I've got lots of changes yet to make in my modeling room yet this year but they need to be done in moderation...lol....Lol....  you're cracking me up (in a good way) old buddy Starryeyes is right . . . two months left to enter the contest so you better get busy and build something !!  |
|
|
|
Post by kooltoon on Aug 3, 2015 20:08:16 GMT -5
AND GET THOSE PIXS IN OF WHAT YOUR ENTERING.
|
|
|
|
Post by wardster on Aug 5, 2015 14:15:17 GMT -5
Roger that, guys!  |
|
|
|
Post by wheaton79chris on Aug 27, 2015 15:49:53 GMT -5
|
|
|
|
Post by Starryeyes on Aug 27, 2015 18:00:12 GMT -5
My workspace. Just got the room cleaned out and making it my     Hope you guys like it. I've gotta get shelves and some other random stuff Looks great Chris ... Plenty of room for building my friend ! |
|
|
|
Post by wardster on Oct 23, 2015 21:33:27 GMT -5
I've been busy, upgrading the garage. It's still very much a work in progress ... but over the last few months it has gone from "totally hopeless, for getting anything done in there, other than being frustrated with all the clutter" to "hey, I can actually work on some stuff in here now, without having to move tons of crap out of the way!" ... which will (is!) motivating me to keep at it. I should mention that building standards in the poorer parts of the (U.S.) state I live in, are, ahem, well, not what people in larger, richer cities are used to. The dirt floors, for instance, tell much of the story. Still, it's got a roof and some walls, and at least minimal power and lighting. The rest of the functionality, let alone creature comforts, I'll have to add over time. (But "functional" comes first, with winter not far around the corner! I'll worry about "pretty" later -- maybe even next summer?!) Soooo .... here's a "before" picture, on one corner of the part of the garage that's no longer just used for random storage: 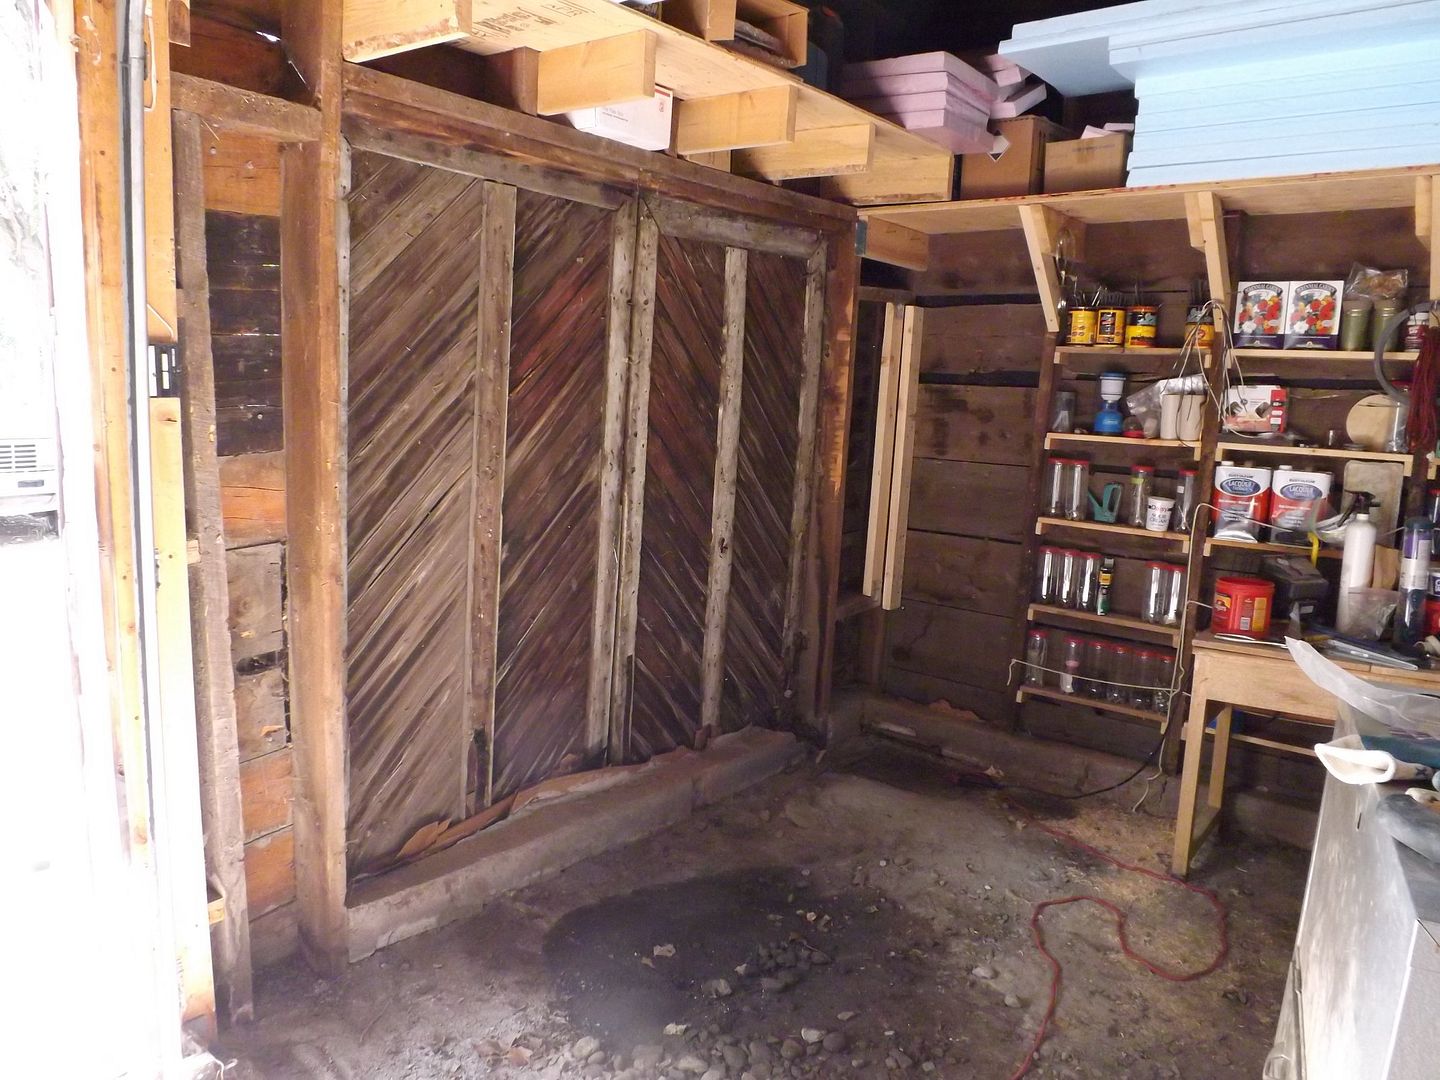 I had cleared out all of the crap and clutter, in that area (seen above), just to get one so-so before pic. Here's the same area, more recently: 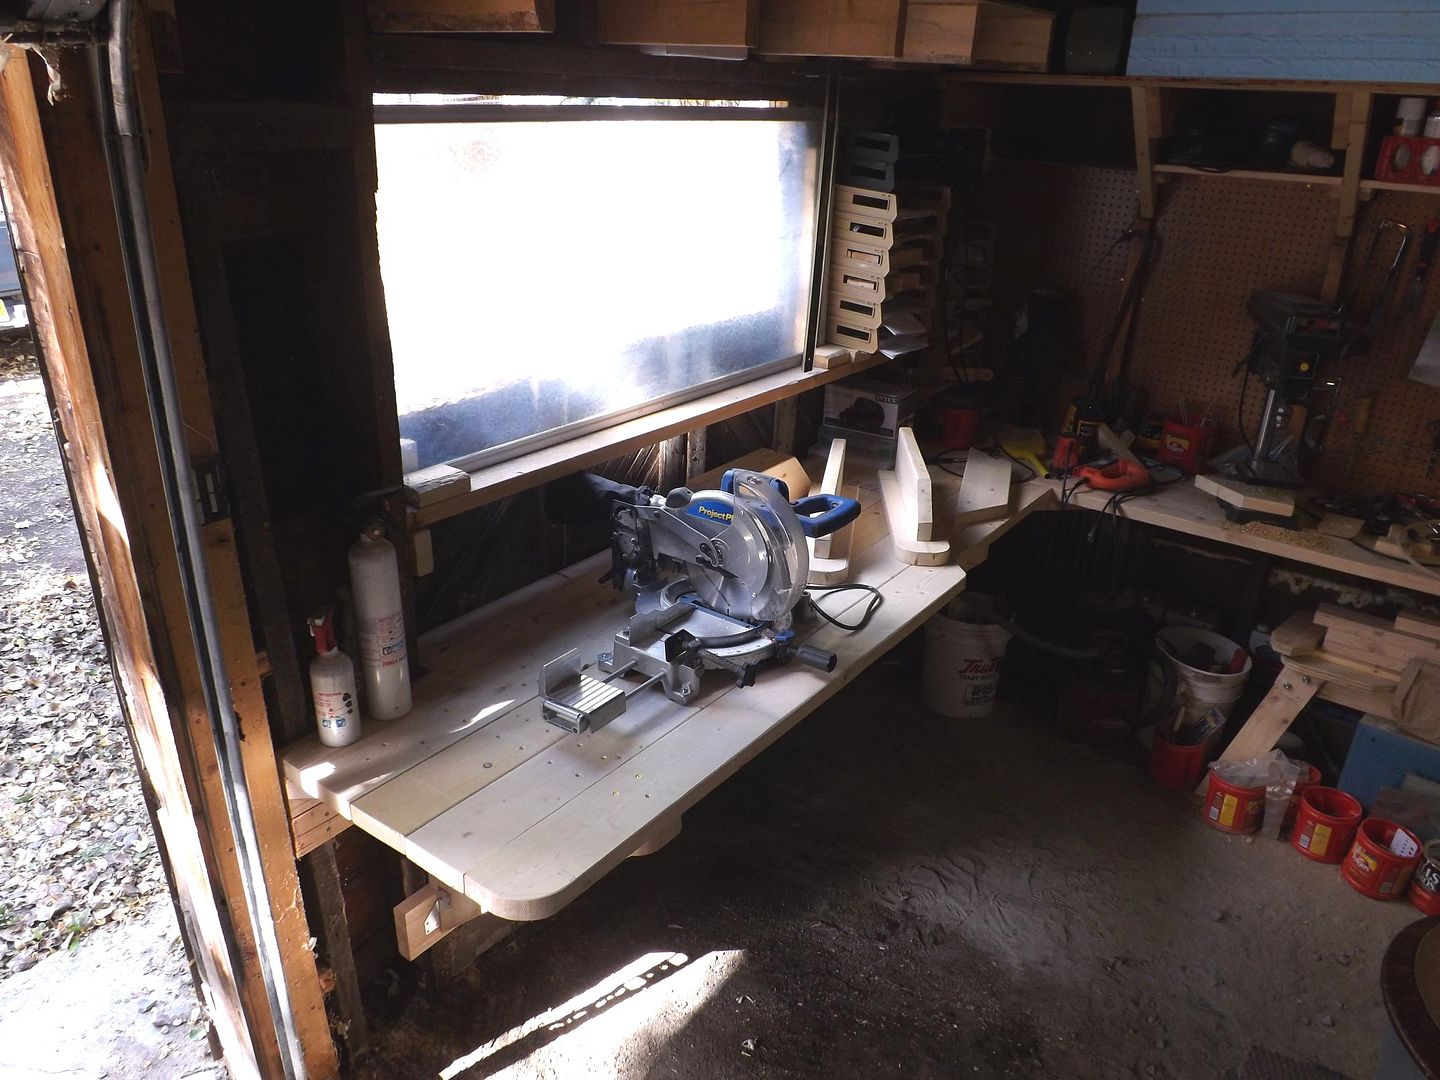 And here's another shot, with better-for-the-camera lighting. (Less conflict with outside lighting, I mean.) 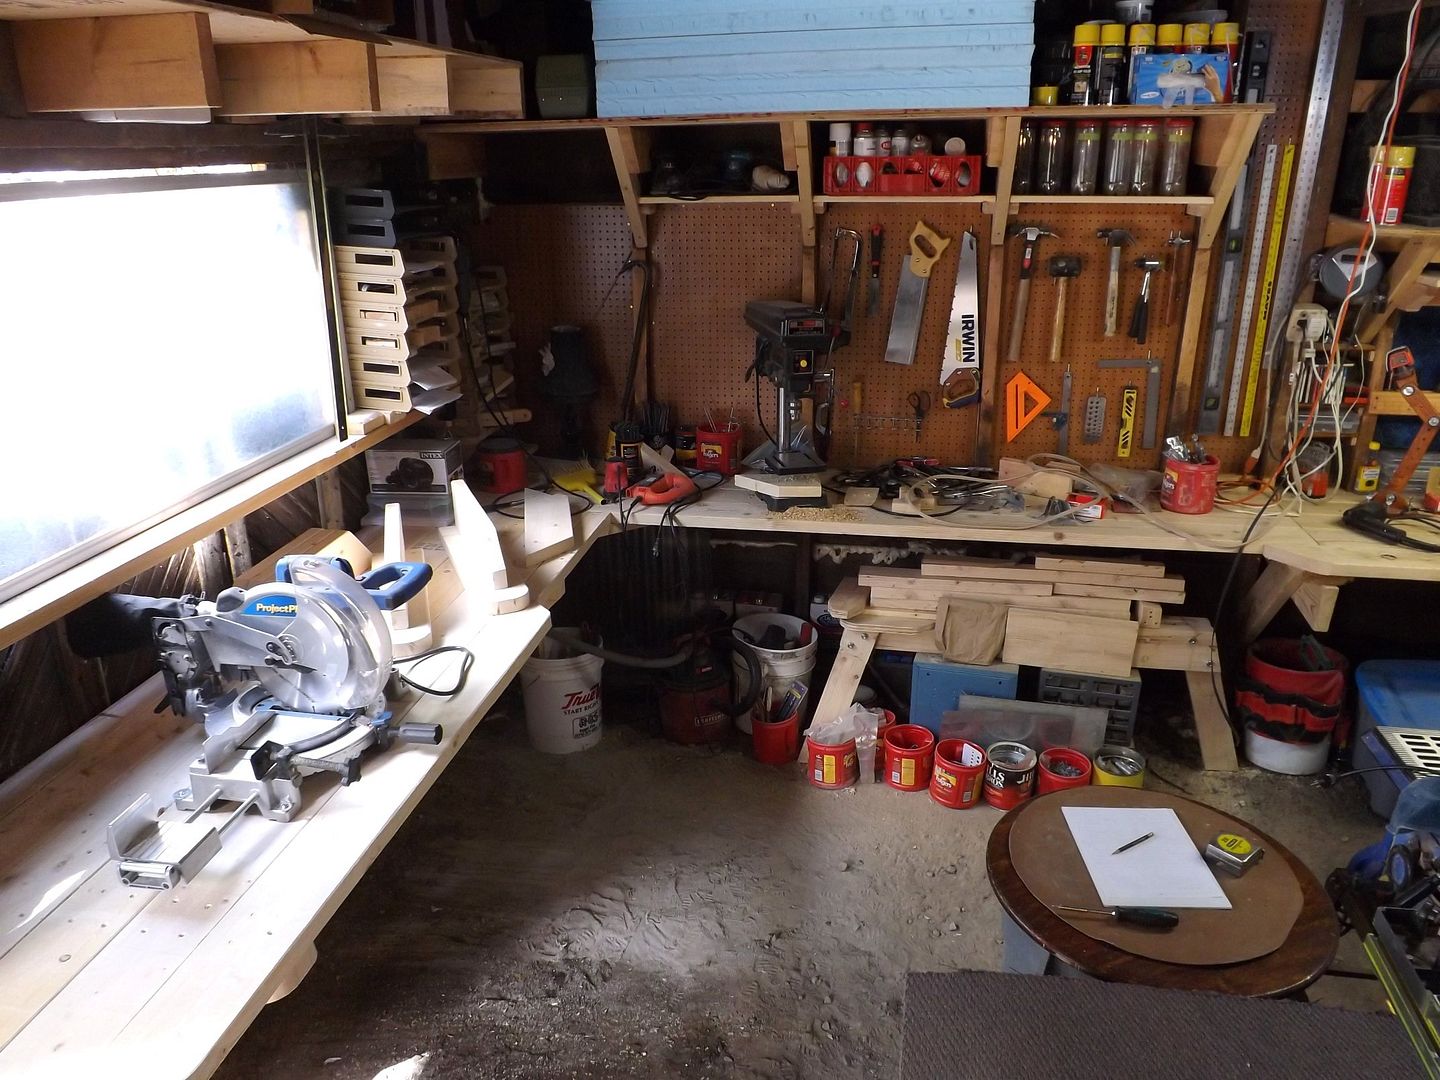 Below: continuing on, around the area of the shop that I'm setting aside for actually getting some stuff built: 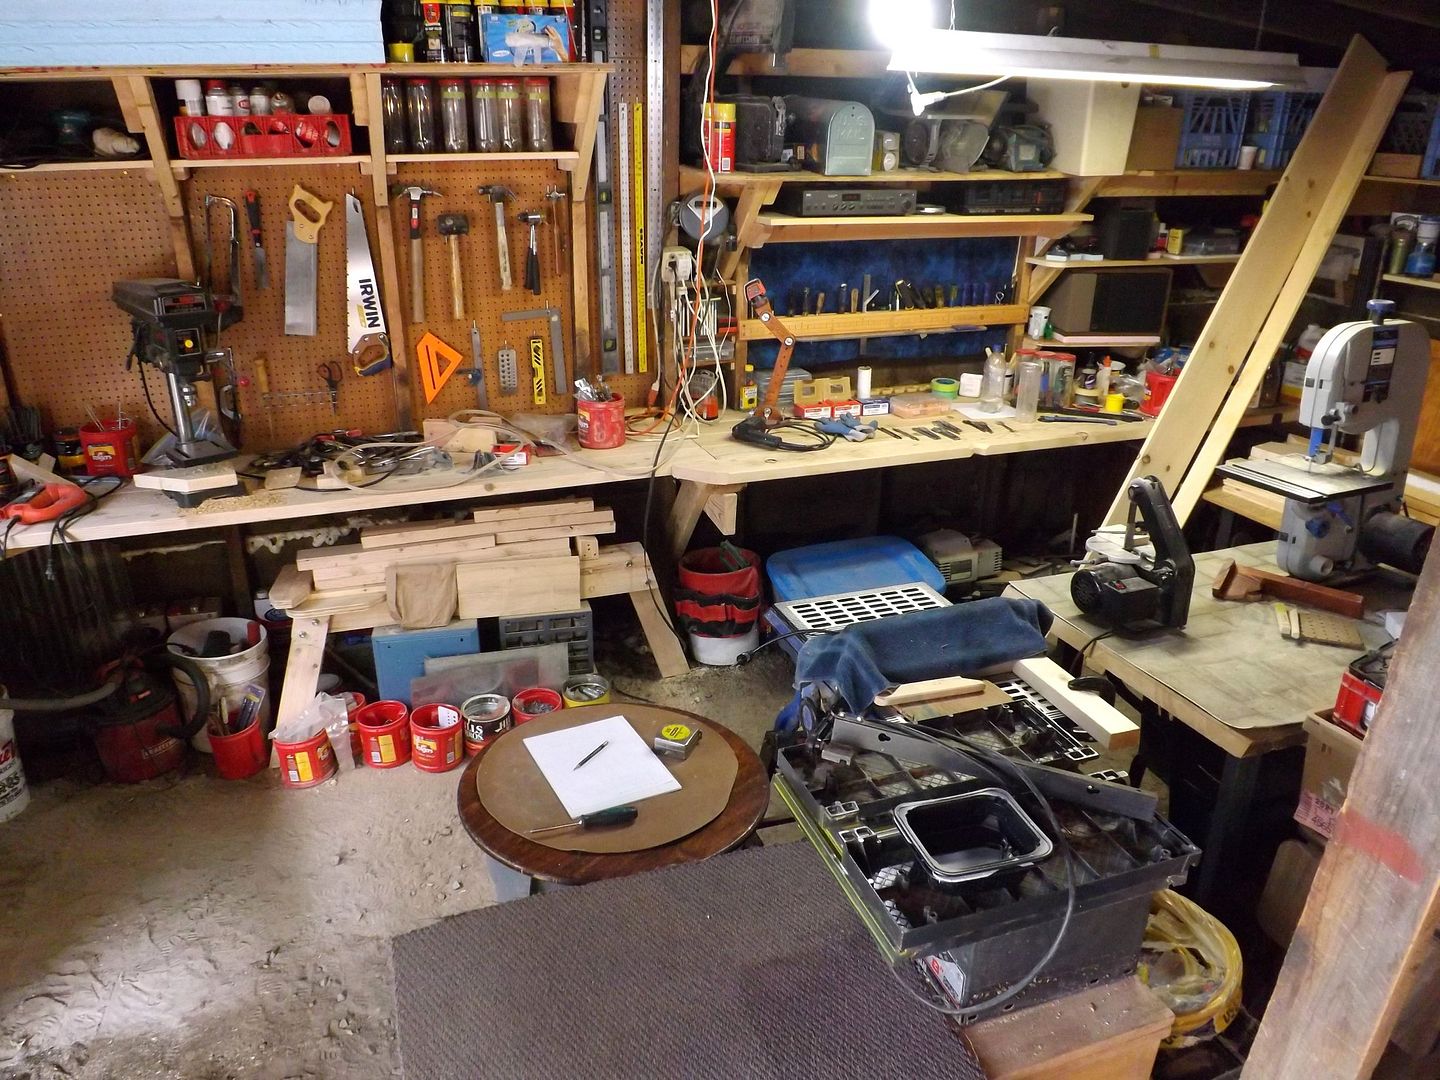 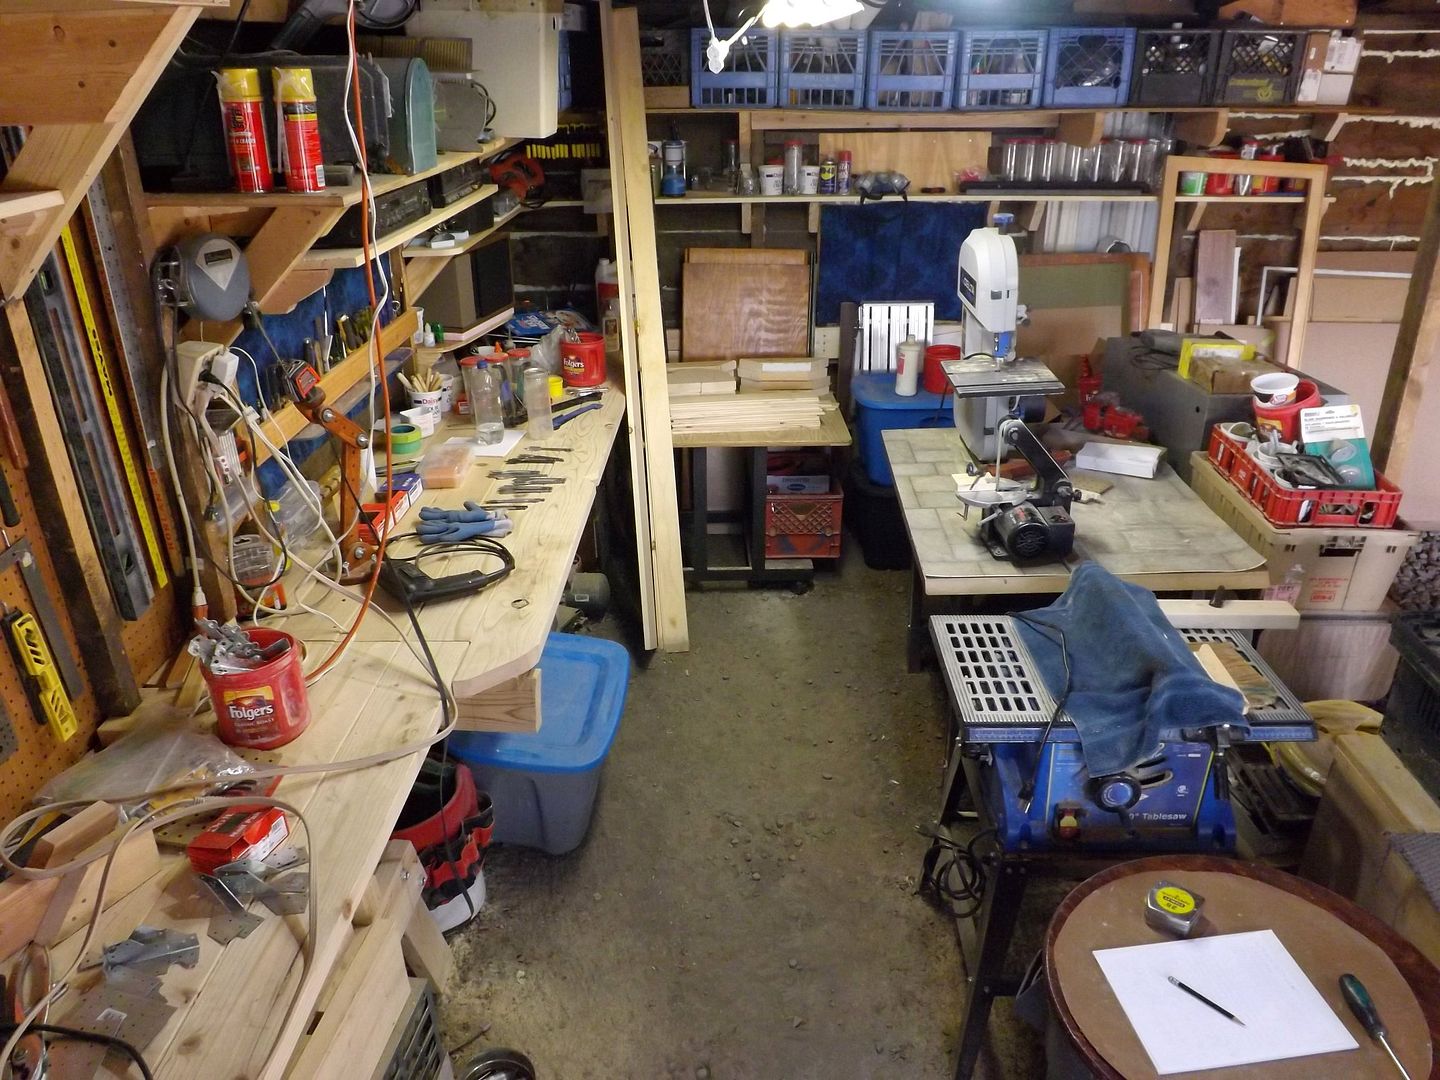 Most of what I'll be building in there, as the wood-working stuff indicates, will likely be made out of wood. But the blue stuff in some of the prior images are large parts of "insulation foam" sheets; which you can build larger-scale models and stuff out of. Anyway, here's a close-up of the radio ... which was one of the first additions I made! (Besides adding some crude windows, in three places. There's a story on scrounging each of those up -- but I'll save that description for sometime later.) 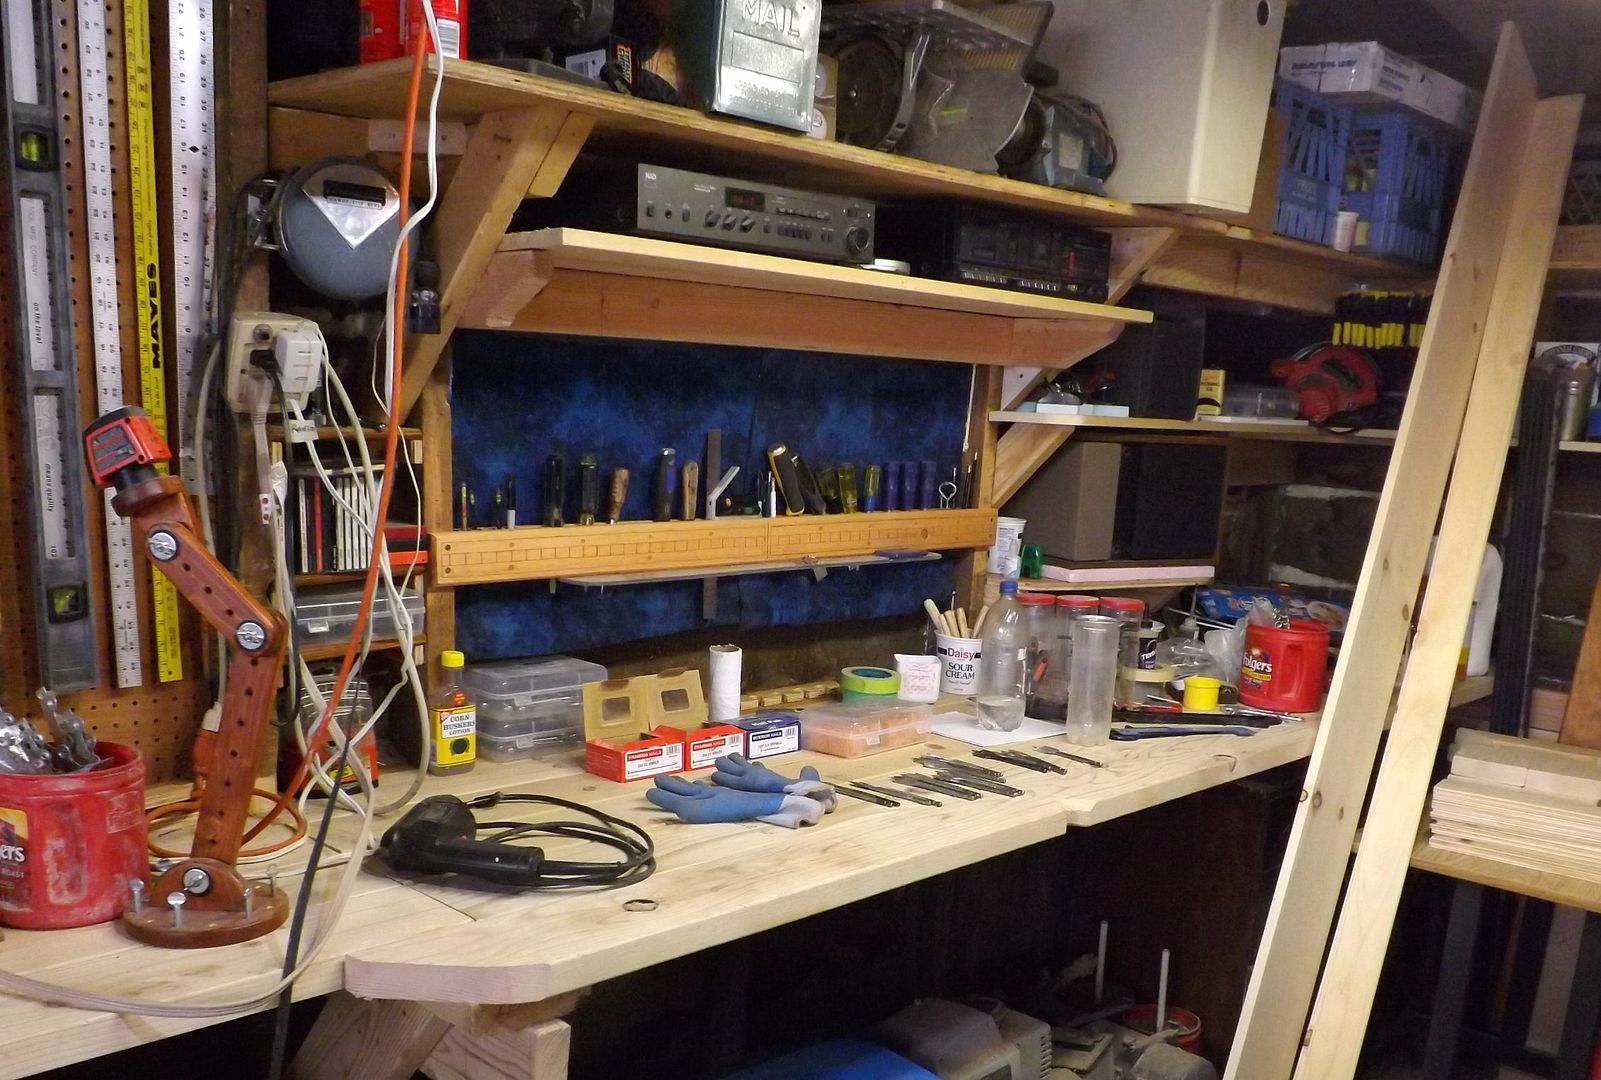 |
|
|
|
Post by modelcarfan on Oct 23, 2015 22:50:48 GMT -5
There are times in life we see things as something we don't appreciate... but once you know you have some kind of passion and urge to do some changes. The area don't usually make it stay ugly but very cool . The ugliness will vaporize and you add all the stuff in with something you can really enjoy. It becomes a place for you. It does not have to be like those in Hollywood because we seen them all the time in pictures. so why follow this... its all about reputation... let alone the image. You create your own cave or place where you can really enjoy your passion there not other's
So I do find it more fun to have that! I think its way cool , wardster.
|
|
|
|
Post by wardster on Oct 24, 2015 3:17:14 GMT -5
Thanks, Model Car Fan! I'm definitely trying to get some light into this old cave! And some work counters, too!  But yeah, a lot falls into the "imperfect" category. And lately, that's okay -- as long as I'm getting lots of functional stuff done, the "pretty" part can wait. I'm Jones'ing for Garage Functionality! A new concept came into my sphere of awareness, recently. I have mostly read articles (rather than books) about the subject of the Japanese concept of "Wabi-Sabi" but I do have a whole book on order about it; and may order others, if it turns out to be as interesting as it sounds. Check out this Amazon book review, to get an idea of what it's all about ... www.amazon.com/gp/product/0865716919... but the main thing I've gotten out of my awareness that some people embrace imperfection, is that I'm getting more done, out there in the garage. I'm not giving up, due to things not turning out "perfect". (Including not giving up before I start, since what I'm starting with probably seems pretty hopeless by some people's standards.) I prioritized my goals so that "useful" was way more important than "perfect" ... and it's working out for what I want, really well so far. So I'm gonna stick with "useful" and "personalized" and keep on going. Example: the "stereo" system in there is actually "mono". I picked up a fancy digital AM/FM receiver, years and years ago (1990s) for only $50 because one channel was blown. Got it at a thrift store. Teamed it up with a Bose 301 (just one of the original pair) that had the least-blown set of tweeters, out of that pair ... and gave it a Bose 161, acting as the upper end of the sonic frequency band; with the 301 acting as the lower-midrange on down. If they're aligned perfectly, position-wise, it blends very well; and gives me all the listening pleasure I could want, out there in the garage. There's an old portable CD player next to the receiver, in case I'm tired of listening to broadcast radio stuff. And a really old (1980s) tape deck, for variety. Another set of examples of embracing imperfection, and just getting it done: the windows in there. The big one would have been WAY out of my price range. If I had gone to a custom glass place, and ordered a window that big, it would have set me back probably $300 for the glass alone. But someone threw out part of a shower stall's glass wall, so I got the glass (and an aluminum frame around it) for literally nothing. Cut a big hole, and plopped the "new window" in there. I'll make it look better, and not be as drafty, later on. For right now, it gives me more light in that cave; so the first part of what I wanted, got done. There are two other windows in there, that are also cobbled together out of random stuff. One is a window from my pickup's camper shell. I parted out the shell, and stuck the window that was up front (on the shell) into another hole in the wall. Even the curtains I'd had made for it, years ago, found a new home. The third window was just a big chunk of quarter-inch thick random acrylic sheet I had laying around for a long time. I just drywall-screwed it onto a piece of plywood backing, temp. The latter two windows are all sealed up, around the edges, with that spray foam stuff. I'll worry about sealing the other one, later on. For now, just to keep things rolling, I'll probably ignore the nicer wooden frame I have planned, and will just staple up some of that window protection or winterizing plastic sheet material, over that big window; with any upgrades made "later". The table saw and compound miter saw, I'd actually won in a hardware store raffle type of contest thing. The bandsaw (which is in use; not the stored ones, way up high) I had purchased new, years ago. A lot of the other big tools are hand-me-down's that I've tuned up, or got working and then tweaked until they're useful. Whatever gets the job done ... as long as it's safe to operate, and it works, who am I to complain about a few imperfections? |
|
|
|
Post by Starryeyes on Oct 25, 2015 20:57:20 GMT -5
You've got to be kidding me !!! This is gorgeous !! I REALLY like the diagonal wood work.. This was a diamond in the rough and you're polishing away making it your own... I admire that old buddy.. Outstanding work..
|
|
|
|
Post by wardster on Oct 26, 2015 4:05:14 GMT -5
Thanks, StarryEyes! Kind words! I'm not sure which "diagonal wood" you mean ... but if it's what I suspect, you're gonna be mad at me. If it's the stuff seen in that "before" pic, it's in a lot worse shape than it looks, and is all "gonna go" at some point. But ... I'll see what I can do, about adding some more diagonal, decorative wood, later on.  Meanwhile, here's some new in-progress pics: 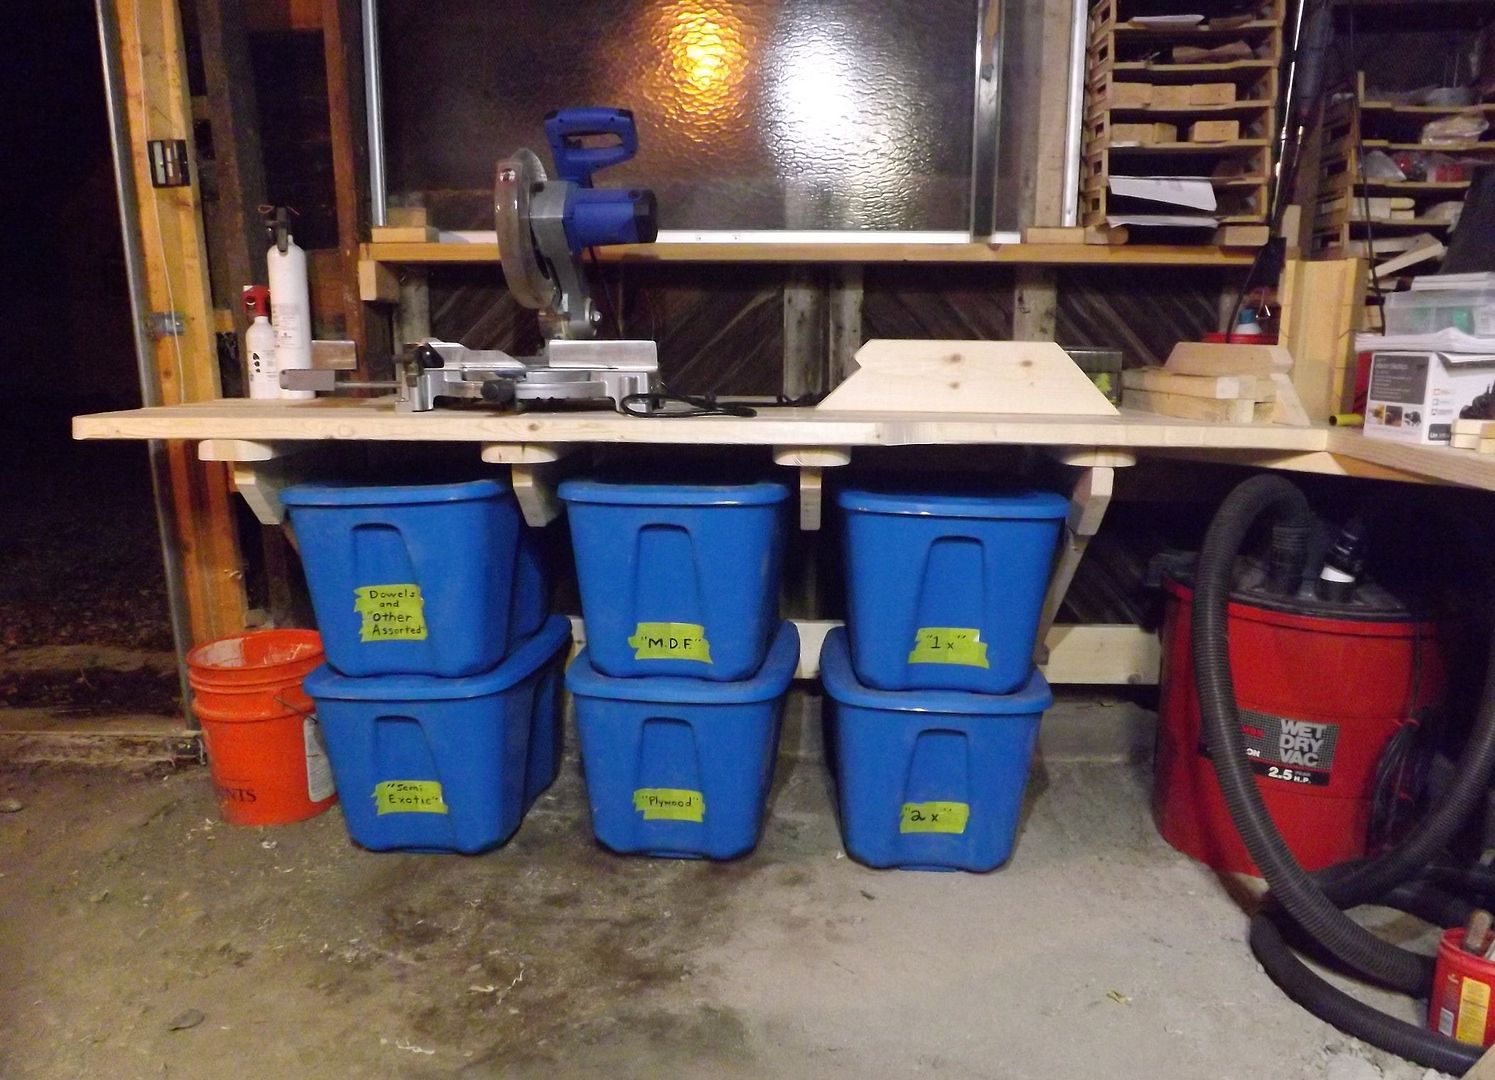 This one, above, is the one that (at the moment) makes me feel best. FINALLY, I'm starting to get visibly organized! Having six plastic totes -- (one for each type of scrap wood that I use the most) -- rocks! No more searching through eighty gazillion plastic buckets / random cardboard boxes and so on, all over the bleepin' garage, just to find some half-decent wood scraps that I can put to some re-use! The holder-uppers under that worktop / counter / whatever aren't 100% done yet ... but you get the idea. I intentionally spaced them, from side to side, so that I could have those three pairs of stacked totes all neatly lined up, right under that work surface. I still have to add the lower, diagonal supporting deals. (Which are already cut out, and are sitting on top of the counter.) Having my trusty old mega-big shop vac in there, where I can get to it and use it, will also be great! Here's a close-up of the "stereo" (which is really "monaural") speaker set-up, on custom-fitted shelves. 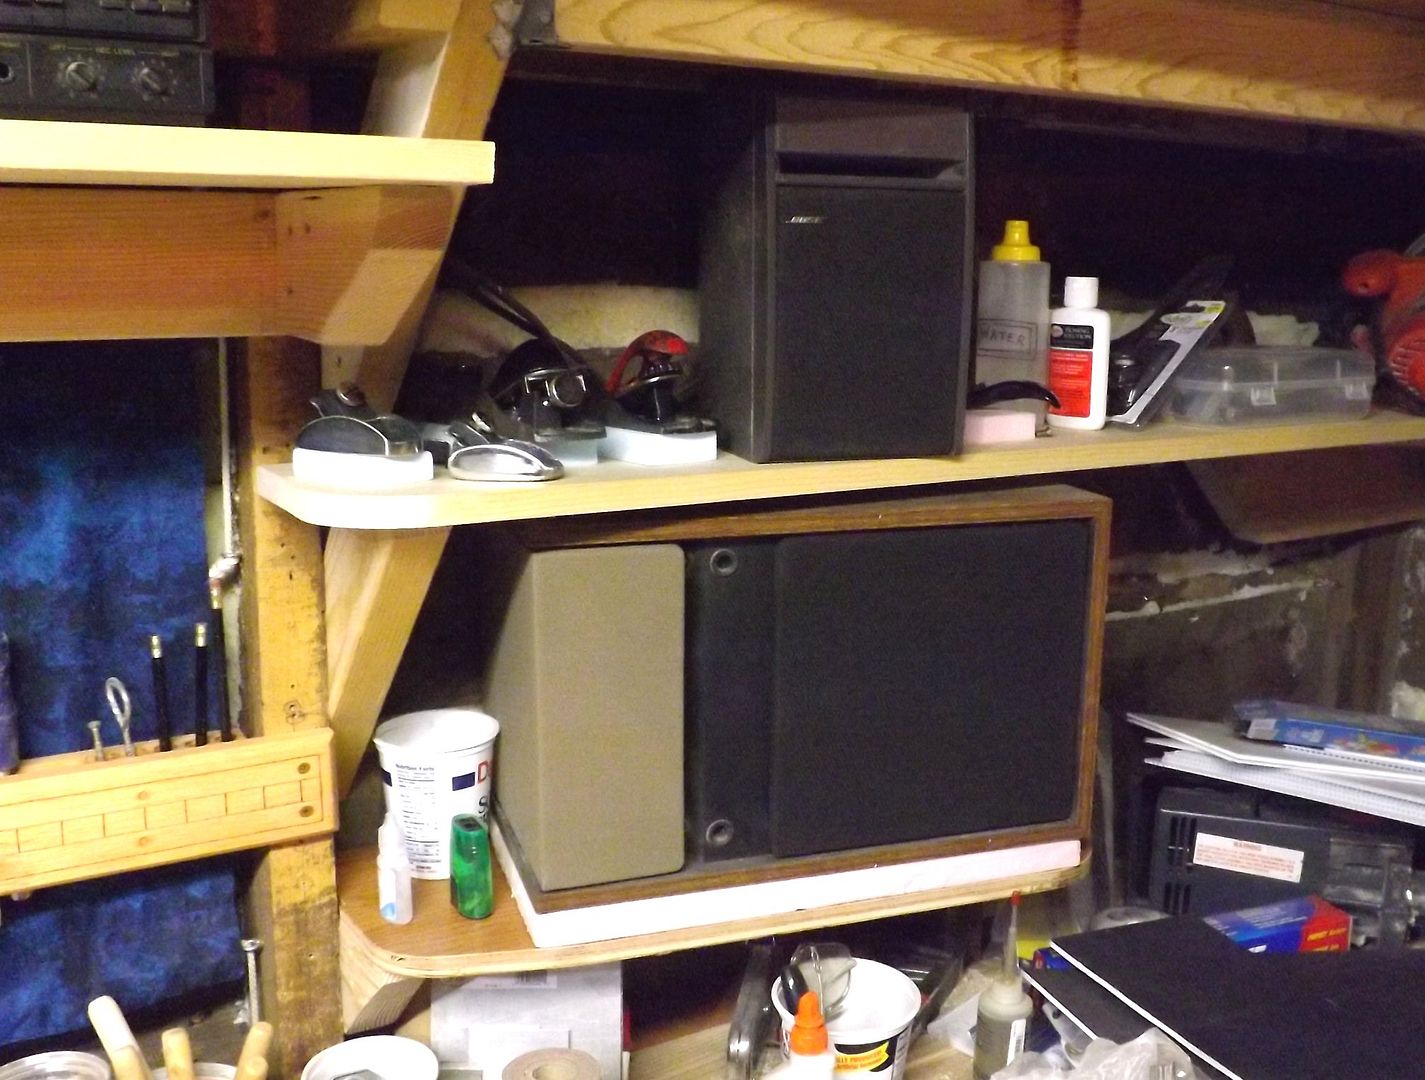 And some "eye candy" (well, almost) shots: 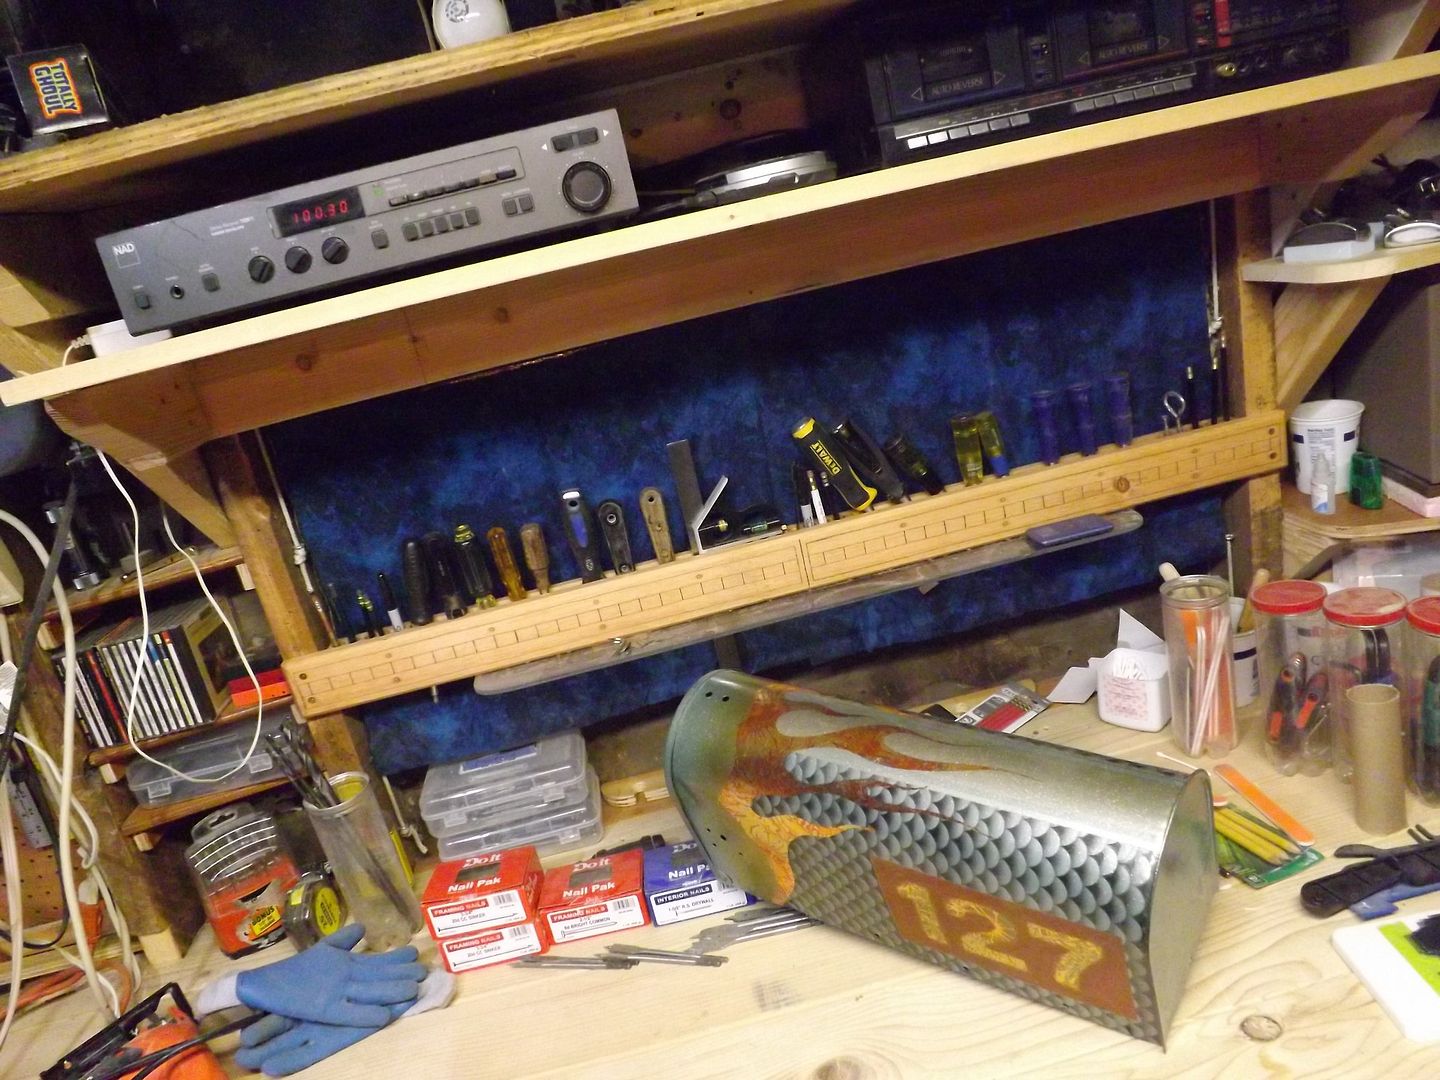 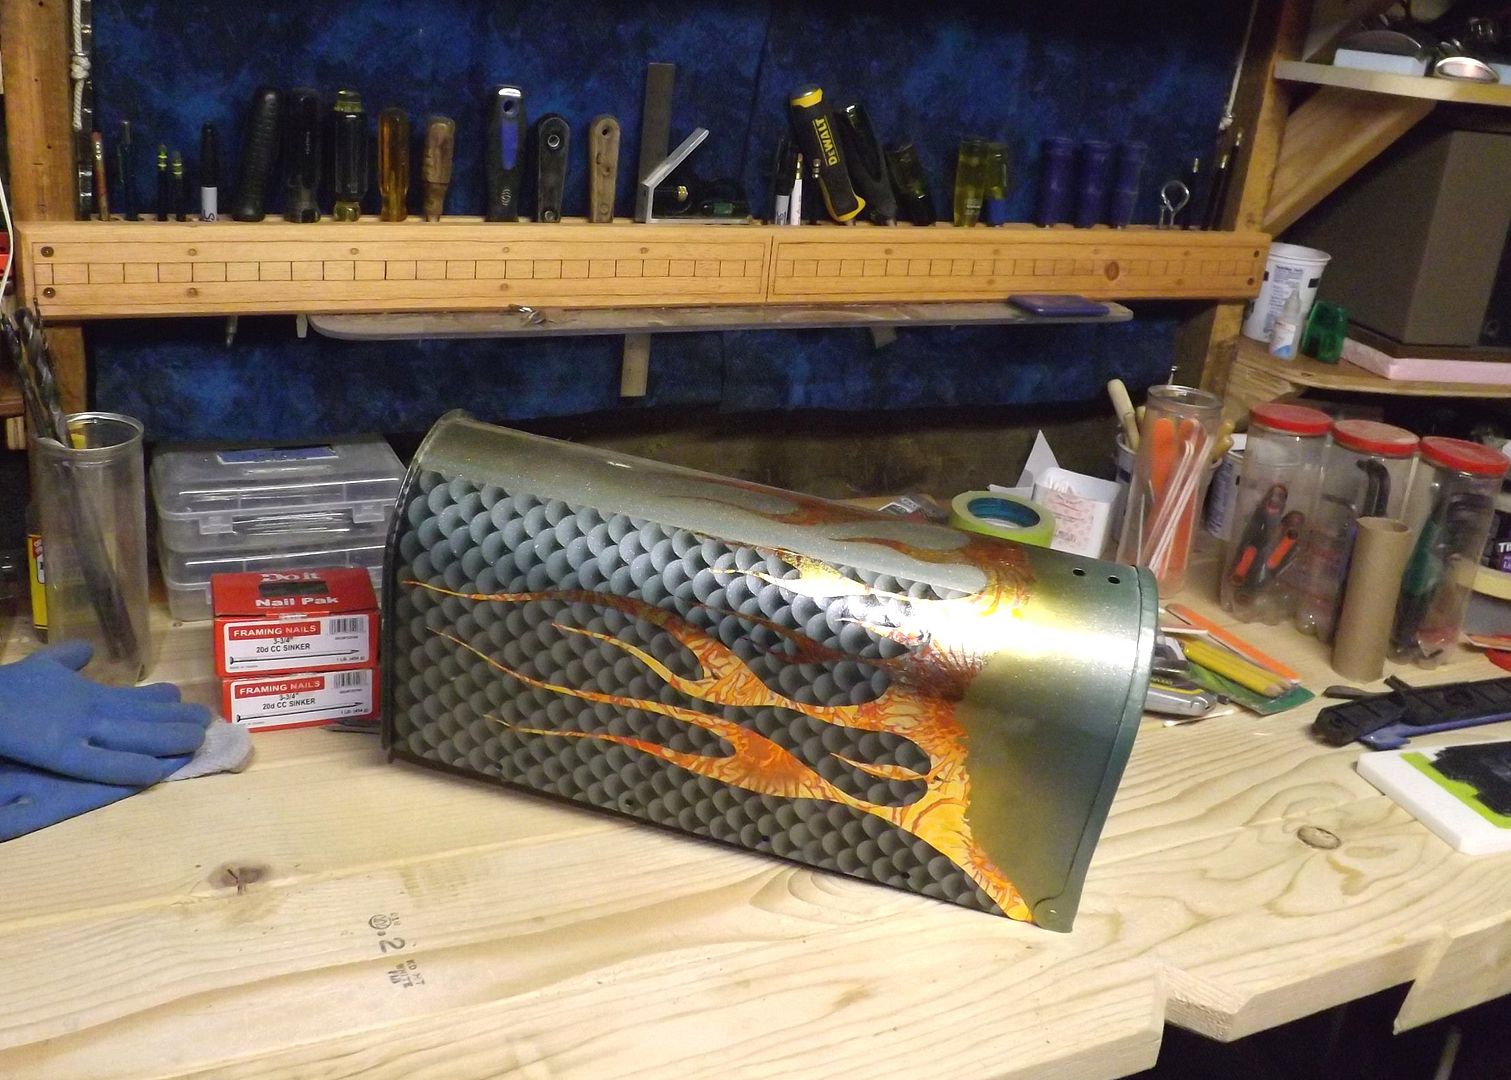 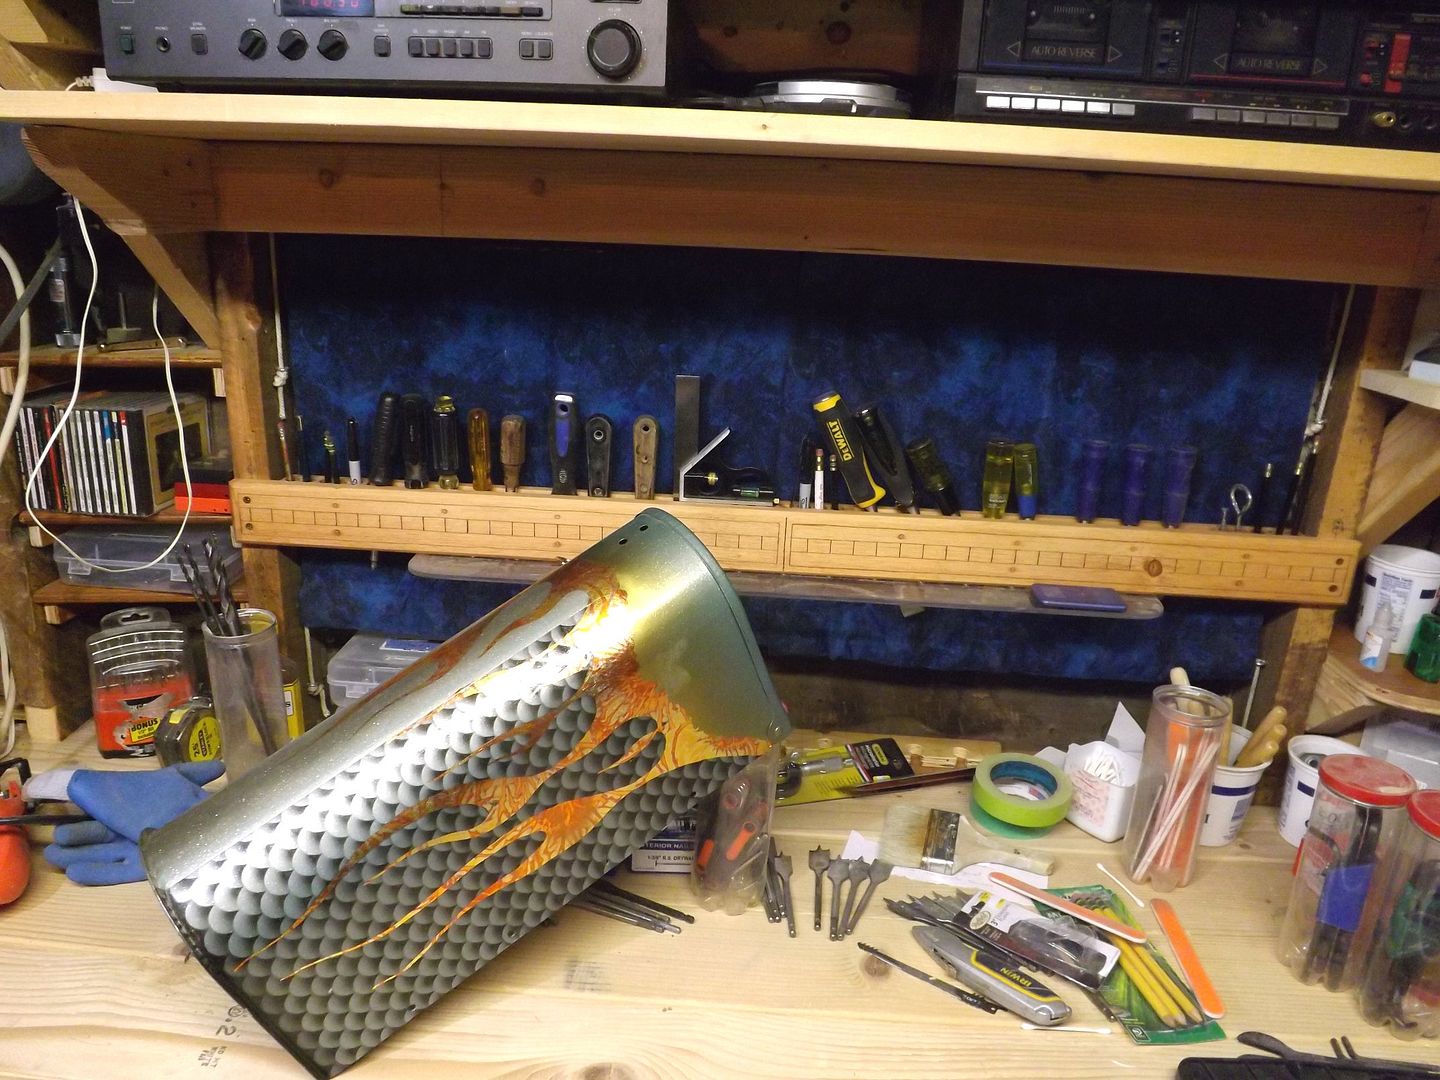 That mailbox still has a longish way to go, before it's finished. It was just sitting there -- you can see the front part of it, in some the previous shots, on one of the upper shelves -- in the garage, when I got a wild hair and wanted to take some more pics ... so I knocked the worst of the dust off, and took pics. I actually started that project a long time ago. Probably over a year ago. It's a friend's mailbox, that I went semi-ballistic on, shortly after ordering some of the great DVD's that "Spritz by Fritz" puts out. He showed how to do fish scales and such on motorcycle parts, and I just tried it out on an old mailbox. It's not perfect (some of the individual rows of scales vary in darkness, more than I'd like) by any means, but it is kind of cool being able to watch a DVD, and then go out and attempt to do what you've been taught. Ditto for the gold leaf flames: that was another thing Fritz's great DVD's show a person how to do. It's really hard, almost impossible to see it in these shots, but there's some mild 'flake in there, too. I'm sorta mainly showing that mailbox because I wanted to show some pics of what's in the background, but by itself, it looked boring. This gives close-ups of that "across the window" tool organizer, while also showing why that mailbox is sitting up on the top shelf, for no apparent reason. As for that "across the window organizer" thing -- that was something I saw in a book about making your own workbenches. (By Christopher Schwarz and the editors of Fine Woodworking, or some such. I'd have to look the title up, but it's his second book on that subject. His first one was really good, too!) Anyway, I really loved that idea, and had to try it out. And it works great! It's really easy to make, too. All it is is two sections of "one by" pine lumber (one in front, and one in back) separated by three short half-inch-thick blocks of pine wood. (That is, the cheapest possible random hardware store stuff.) Just wood glue it all together, and let the glue harden or dry up; then, using a drill press, drill a bunch of half-inch diameter holes down into the three spacer blocks. That way, the two big long empty spaces get used for screwdrivers and chisels and such; while the three spacer blocks (which keep the long front and back boards apart: leaving a half-inch-wide slot to drop tools into) get used to hold random pencil, Sharpie markers, or what not. The pencil holder trick I added. That wasn't mentioned in the book I had read, but seemed like a good way to put that tool organizer to even more uses. And it's turning out to be super handy to have that many sharp pencils, within easy reach. Another trick I added to that tool organizer was a short plastic shelf, gently screwed into the bottom edge of the front board. It won't take much weight, but I don't plan to sit a truck engine block on it, any time soon -- so that's fine. One thing I added, or retro-fitted into the design, a few days or a week after having built it, and installed it, was the design I cut into the front of the front board. It's a center finder! There's a vertical line located in the center, and sort of a "ruler" that goes out, both left and right. It's marked off at regular, one-inch increments, but doesn't have any numbers. Instead, I had an old leather-working tool set, with some decorative punches or whatever, that leave impressions when you hit it with a hammer. I used a couple of those tools and a small ball-peen hammer, to tap some "5 spaces" and "10 spaces" type markings on the face of that board. That little plastic shelf works great (although it wasn't originally planned to do so) for holding things like scraps of wood, up and against that little "center finder" thingie. When both sides of the scrap are evenly spaced, from side to side, then I just mark a line where the pre-marked center line indicates it should go ... and then go drill or cut the part, or whatever I need to do that required me to locate the part's center. |
|
|
|
Post by Starryeyes on Oct 26, 2015 7:35:06 GMT -5
This one buddy - love the wood  |
|

