|
|
Post by ira on Mar 22, 2015 17:28:38 GMT -5
Great Progress Ward!Thanks for Sharing... 
|
|
|
|
Post by modelmaster1958 on Mar 23, 2015 10:25:45 GMT -5
great work
|
|
|
|
Post by wardster on Mar 23, 2015 12:54:05 GMT -5
Thanks much, Mr. Ira and Model Master! Here's another pic: 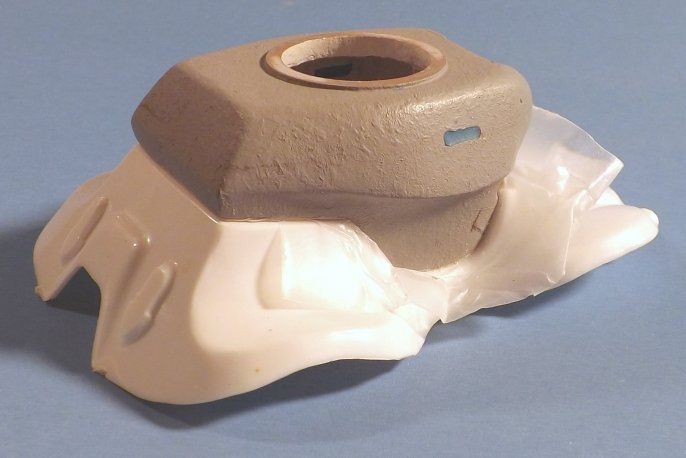 This time, it's showing the front half of the turret / body gap being taken care of. I've already trimmed off the excess Magic Sculpt, where it oozed / squished out, under pressure -- so you'll have to mostly take my word for it, that it was added. (If you look carefully, you can see a thin strip of it, dried, towards the back.) I should probably mention that the blue stuff that's inside the rectangular vision slit, is temporary. It's a product called "Kleen Klay" -- and my having added it, at this stage, will probably make more sense, later on. (Simple explanation, for now, is that I didn't want to forget to add it, temp, later, during the re-molding work to come, on the textured and otherwise slightly upgraded turret casting ... so I added it while I was thinking about it.) |
|
|
|
Post by brizio on Mar 25, 2015 10:45:52 GMT -5
Great project!
|
|
|
|
Post by wardster on Mar 28, 2015 0:19:44 GMT -5
Thanks, Brizio!
Time for another update. Mostly gonna discuss molding-and-casting tasks and decisions, this time around. I'll see how it goes, by showing a bunch of pics first ... and then typing up an overall explanation, probably tomorrow morning. (Or whenever. I'm anxious to get back to work on the actual model, later tonight, and may wait longer to type up anything "big". Gotta keep contest-momentum going, now that I finally got some workbench time!)
Pics 1, 2, and 3 are basically just different camera angles, on the same work-in-progress pieces; so you can better see the shape of the sculpted "Kleen Klay" or whatever. (The dark blue stuff.) Later on, there will be a third piece of this rubber mold ... and the sculpted clay-like material will be the shape of that piece.
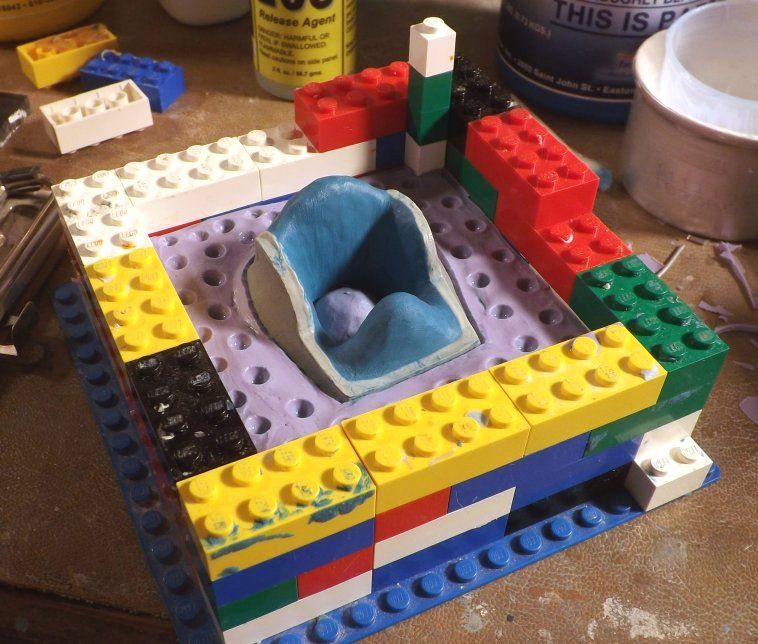
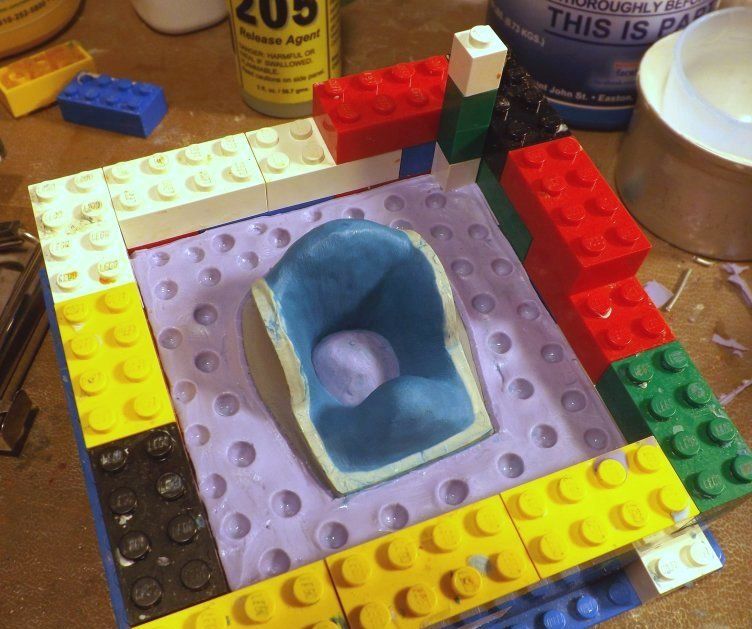
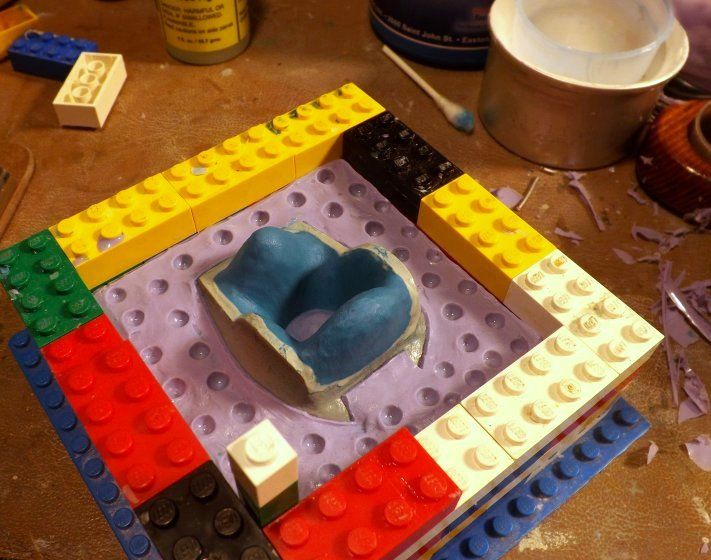
Pic 4 shows things, a bit later. (Basically: after pouring the lower (upper, right now: since it's shown upside-down) half of the "normal" part of this mold; and then removing that half; and thus showing the "intermediate master" part I'm using to create this new-and-improved mold.)
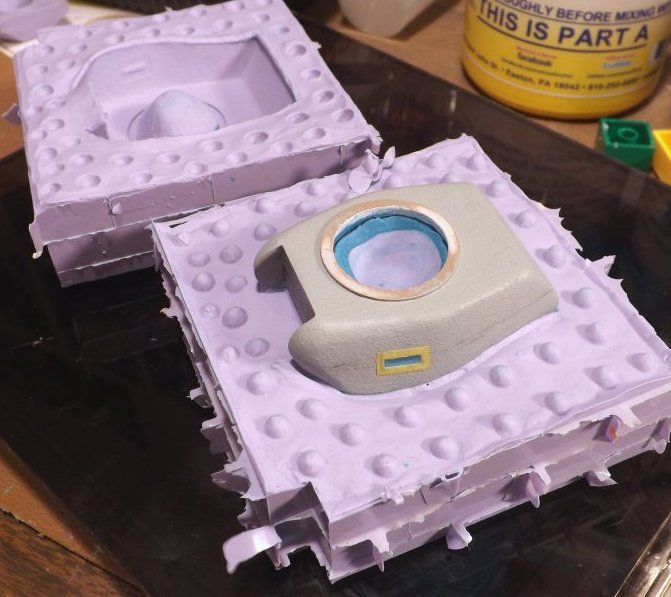
Pic 5 shows an even later stage of the work-in-progress. (The carefully sculpted blue clay made the shaped cavity I needed; then, I cut two holes in the lower part of that mold piece -- which will make more visual sense later; I hope.)
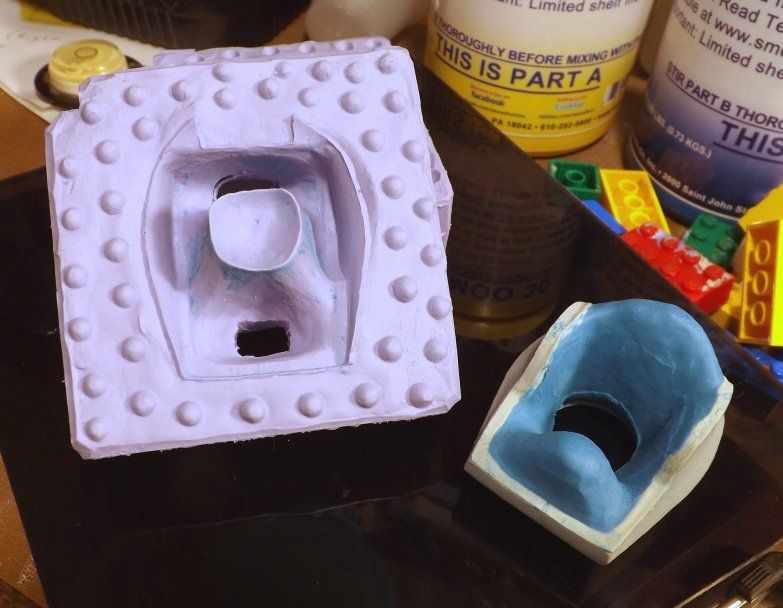
Pic 6 shows me removing the Kleen Klay (in many pieces) and storing it for re-use, after it had done what it was supposed to do, with this mold.
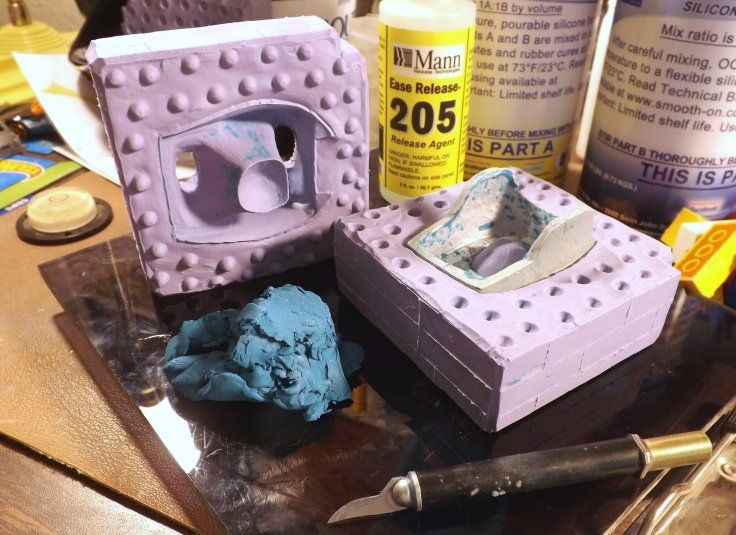
The background of that pic shows some brush-on mold release: which I brushed onto every mold surface, on both the upper and lower halves, as seen here:
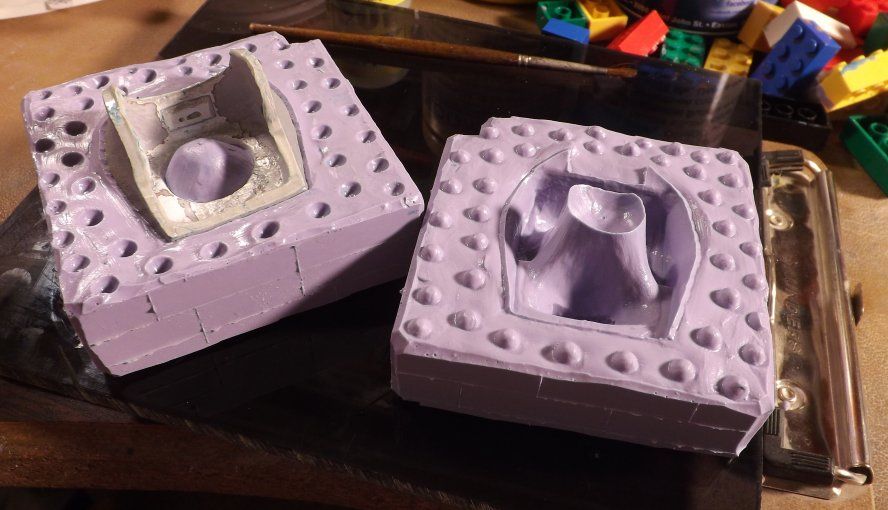
Sorry, but I didn't take pics of the next several steps -- so an explanations with words (but no supporting pics) will have to do, for this next segment.
I then put the (also heavily "mold released") turret "master" back into the upper mold half; then re-assembled the upper and lower mold pieces, over that intermediate turret master ... giving me, at this point, two pre-made rubber mold pieces; plus the turret "master"; plus the empty cave or cavity or weirdly-shaped hole, where the shaped Kleen Klay once was.
I turned the carefully mold-released, re-assembled mold pieces, (as an assembled unit) upside-down; and then carefully poured mixed RTV rubber into the mold, through those two holes I had cut, a few steps ago. (Making one of the two holes an entry point for rubber; and the other, an escape hole for trapped air.)
Once that third piece of rubber had hardened up, I could flip the whole thing right-side-up; gently ease the upper, outer mold "half" up and off ... remove the now-combined turret master, plus the third piece of the mold (with those two pieces temporarily being "one piece") ... and then, carefully separating those two.
The whole point of that third piece being that I didn't want to make this a two-piece turret casting, if I could help it. I wanted to stretch my skills, with making molds and castings, so I just stuck with the thinking or "pre-meditation" part of all this, step-by-step, until I felt I had come up with a way to cast a (relatively) thin-walled, hollow, sometimes-delicate turret casting ... all in one piece. Oh, and to complicate it a bunch more: the turret's interior had many large "undercuts".
Here's the first casting I had made ... once I had each of the necessary mold parts planned and made, for this relatively-complicated, three-part rubber mold.
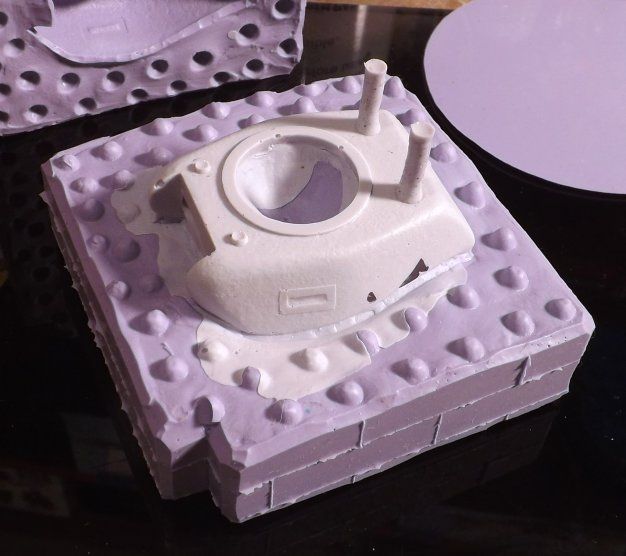
To be honest, the first attempt was only half-usable. (Too many internal problems.) The second attempt, after changing casting procedures, was worse! But the third attempt at casting "resin" ("liquid plastic") parts in this three part mold gave me a casting that only required a bit of fixing-up'ing, before I could use that casting. Given that I'm hoping to get this model done by deadline time, I'll shut up for tonight, and get back to work on the actual model; now that I have a cast turret piece I can use, which has a bunch of upgrades (textured outer surfaces; eye slits, etc.) built into it, as compared to the first few castings I had made, a long time ago. (See previous posts for that.) |
|
|
|
Post by wardster on Mar 28, 2015 0:33:55 GMT -5
Just to clarify a few points ... (after reading back what I typed, above; and trying to imagine someone else trying to interpet the intent, and make sense of the steps I used to accomplish what I needed to.)
The upper part of this mold, where it needed to shape the turret's exterior, was a very straight-forward task. The lack of undercuts, or places where cast parts would fight coming out of the mold, later, were very very minimal. Practically non-existent. So a "normal" one-piece mold "half" was all I needed, for the upper "half" of this turret's rubber mold.
The bottom part, though, was super-ambitious. I'd never made a mold that was this complicated, prior to this. (Never had the need!)
So, basically, the bottom "half" is really a two-part mold, in itself: one piece being necessary to shape the turret's exterior, and the other piece being necessary to create the turret's interior shape.
(More later, on that ... if anyone even wants to hear more about it?) Personally, I'm all stoked about it, because now that I've successfully come up with a system to do castings this complicated, I'm sure I'll find ways to put the knowledge to use with other models! I've always wanted to figure out "how the big kids do stuff". That really motivates me. And I did that, with this mold -- so, I'm all happy that I stuck with such a challenging task; and figured out what I needed to, to get it all done.
Meanwhile, though ... the deadline for contest entries is looming, and much work still needs to get done on the model itself ... so it's time for me to shut up!
|
|
|
|
Post by wardster on Mar 31, 2015 2:51:19 GMT -5
Yikes! Feels like a week ago that I last did an update on this project, but it's only been a few days ago. In any case, here's the next pics: 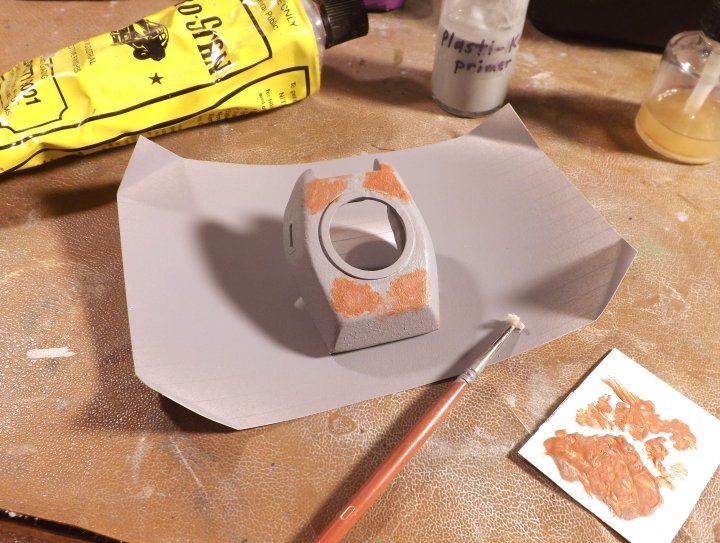 (Above -- adding some texture to the improved, and re-molded turret's casting; in areas where vents and such had made "flat spots".) 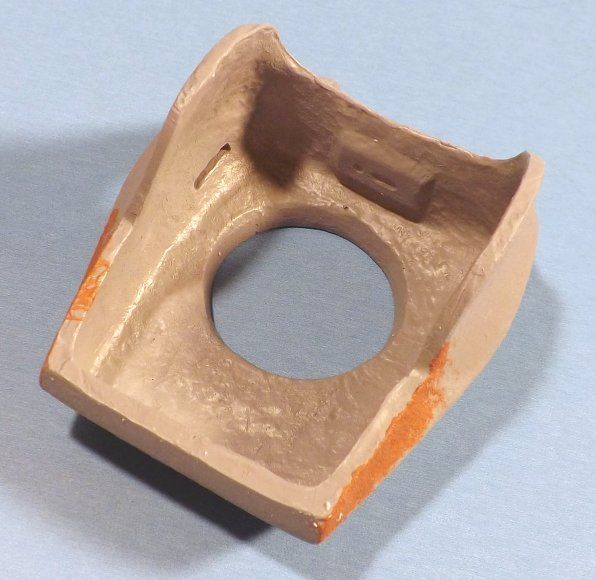 (Above -- same basic deal.) 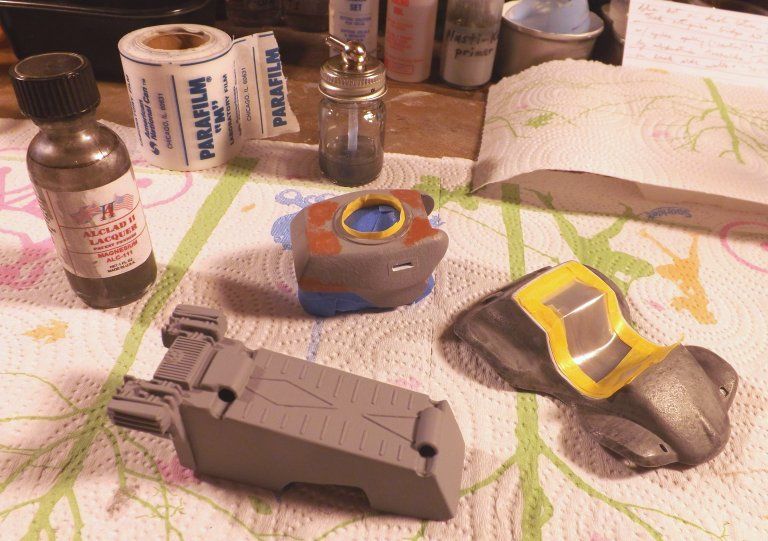 (Above -- skipping ahead to "last looks," before the metallic basecoat goes on.) 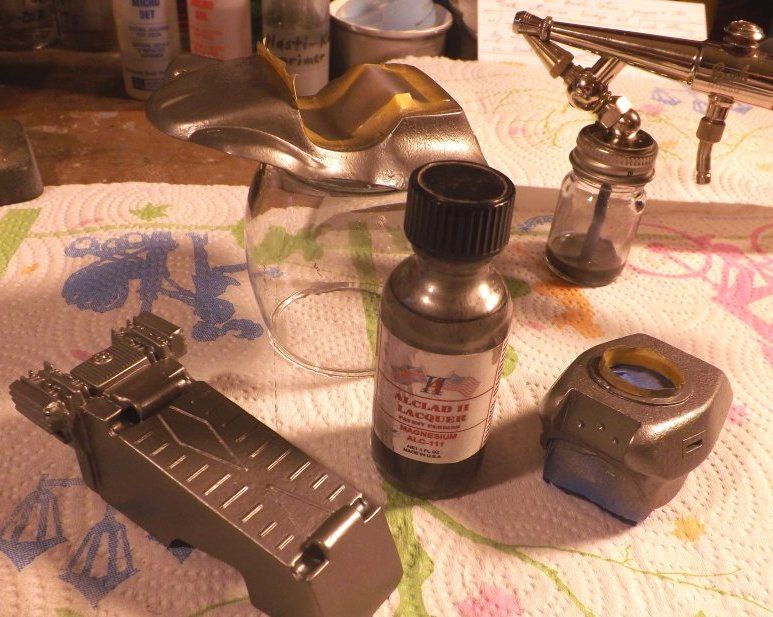 (Above -- after the metallic basecoat went on, and had a brief drying period.) 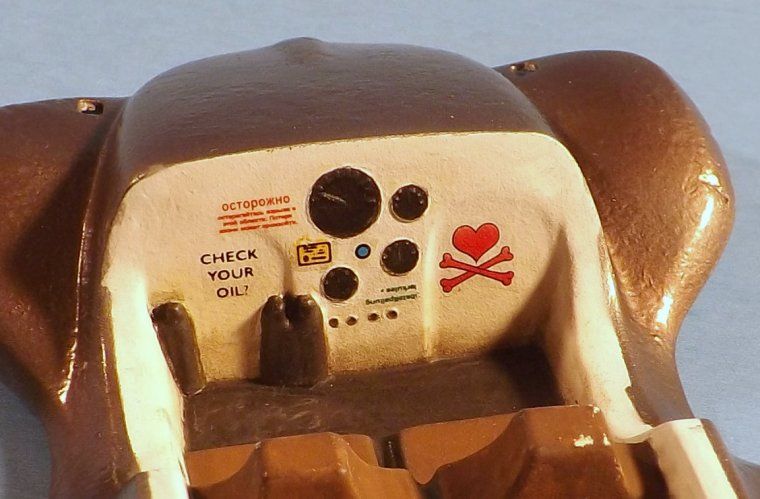 (Above -- after unmasking the cockpit area.) The last photo shows the kit's molded-in gauges, after painting; and some nifty-looking decals from my spares collection, which I used to brighten things up a bit in an otherwise "plain vanilla, boring white" area. Cockpit walls inside tanks, as I understand things, are often white -- (to bounce light around, more effectively, inside that "armored, windowless cave") -- but this being cartoonland, I figured there would be factory stencil data; some crew embellishments; and so forth. |
|
|
|
Post by wardster on Mar 31, 2015 4:12:05 GMT -5
I figured that if this cartoon vehicle was supposed to inspired by real WWII tanks and what not, that a few pin-ups in the crew compartment would be appropriate and fitting -- and would make the interior less plain vanilla and boring. If nothing else, the (G-rated) decals do bring a lot of color into that relatively small space. 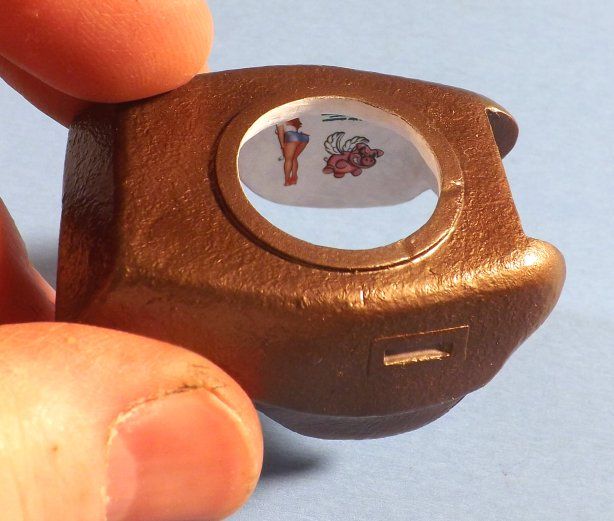 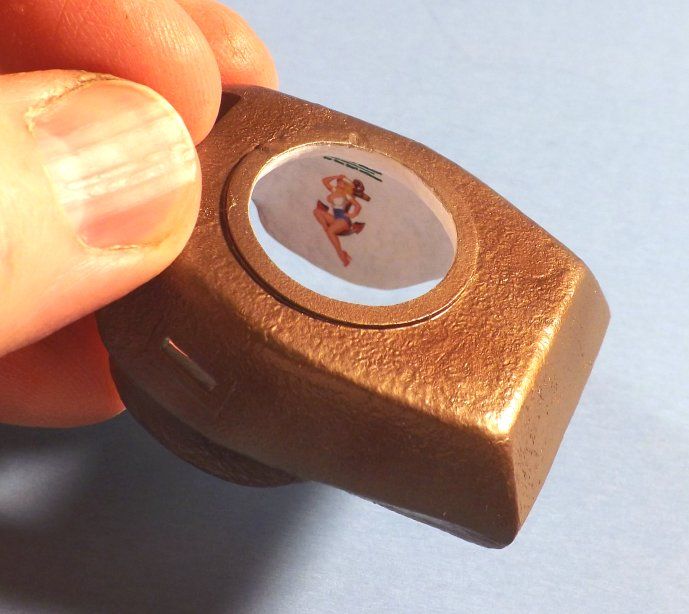 And here's some close-ups, as seen from a passenger's-eye view: 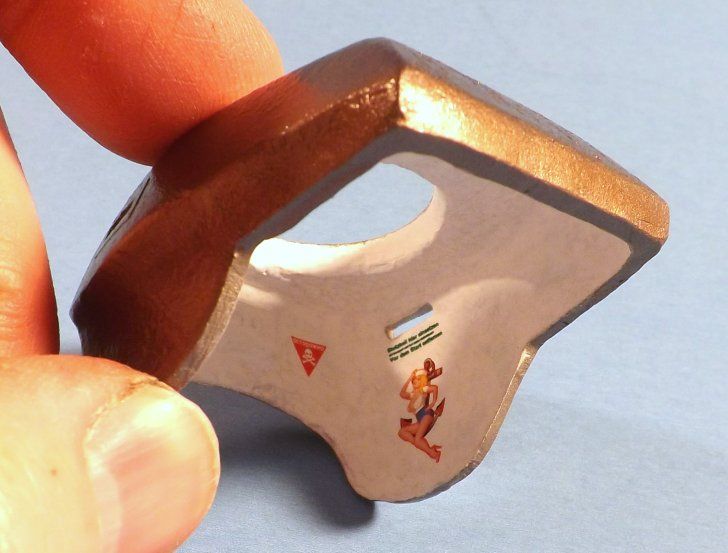 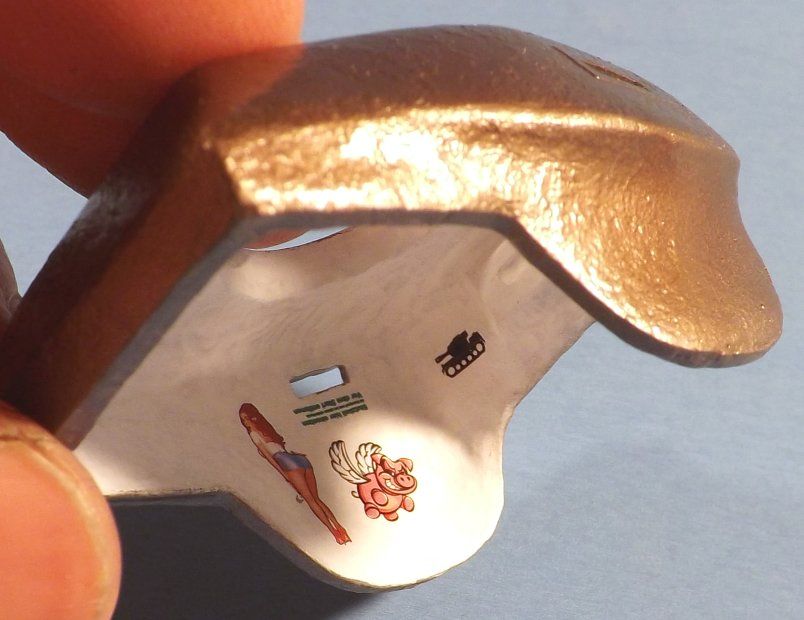 The grinning, flying pig, I think is my favorite. It and the pin-ups were part of the various decal sets sold by Dust Games. |
|
|
|
Post by TooOld on Mar 31, 2015 7:04:39 GMT -5
Great decals !  |
|
|
|
Post by chappy on Mar 31, 2015 7:07:40 GMT -5
Sweet!
|
|
|
|
Post by wardster on Mar 31, 2015 10:29:13 GMT -5
Thanks, guys! Appreciated! I've always been impressed with the quality of the decals made by Dust Games. And they have some cool / imaginative designs, too! www.dustgame.com/products.php?sid=44Besides those, a few other manufacturer's decals got used, here or there, wherever I needed a bit of color or some "less boring-ness" in terms of the paint job. The warning signs or placards which had Russian style letters came from the "Red Star 47" kit by Industria Mechanika, for instance. (They sell the decals seperately, and I had picked a set up.) The green lettering used here or there was from a V-1 kit by Tamiya. (Went with that color, due to WWII Soviet military stuff using a lot of green exterior paint. Figured they'd use it elsewhere, too; just from having a lot of it around?) While I mostly tried to stick to Russian-style or unreadable lettering, I couldn't resist one english-style decal: the "Check Your Oil?" reminder on the dash, for example, being from a Walthers (model train) decal sheet. That one just fit the space really well, for one thing. I was gonna stick it near the engine, but put it on the dash. |
|
|
|
Post by wardster on Mar 31, 2015 14:34:41 GMT -5
Still thrashing away!
Before I buttoned up the turret, for good, I wanted to maximize the crew-embellishments portion of things. Using a 0.3 mm mechanical pencil, I added a little collection of hash marks, near the tank symbol; some Russian-style text, with the lettering style, etc., as taken from copies of WWII Russian propoganda posters ("for the motherland," etc.); and even drew in a little Kilroy symbol. With all that being done by hand, in the formerly-bare spots, on the turret's interior walls.
I just now finished off the paint job and weathering, and various touch-up work, on the rest of the cockpit (the actual Glitterbug portion of that "interior space") ... and then added some pastel chalk dusts, in various rusty colors, to the exterior areas of all the "armored metal" portions of things ... and I have some protective clear on it, and drying.
I've been taking lots of "in progress" photos, as I go ... but won't take time to post them, until after posting the "finished" shots. I'll keep taking the in-prog shots, as I work ... but need to get the model all finished, and the final photos posted, before I worry about catching up on the in-progress photo backlog.
Anyway ... back to it!
|
|
|
|
Post by wardster on Mar 31, 2015 22:53:39 GMT -5
Nope ... not gonna make it in time for the contest deadline. Oh well. No biggie. Would'a been cool to get it done, and enter it ... especially given the prizes, etc.! ... but this model is much farther along, now; thanks to the motivation supplied by having a contest and a deadline!  That's sort of a prize, in itself! So, now that I know the deadline can't be met, by me, I can slow down a bit, and can catch up on posting work-in-progress pics, before too long. (Got plenty more work-in-progress shot to sort through and upload, from today's work!) |
|
|
|
Post by wardster on Apr 1, 2015 2:23:28 GMT -5
Here's two of the new, work-in-progress photos I mentioned before. 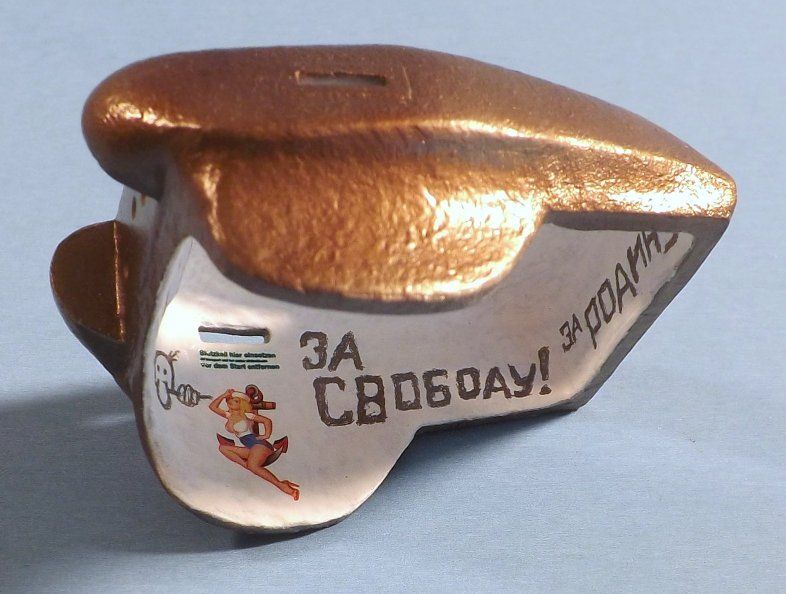 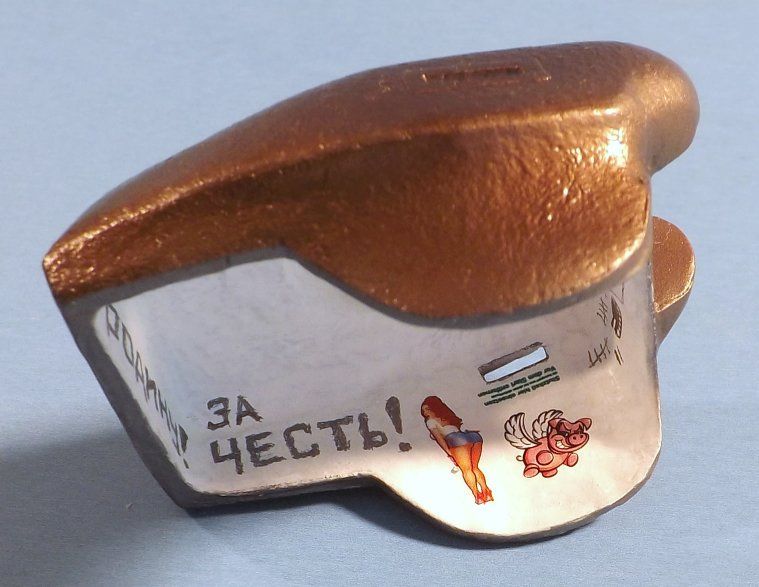 Here's the web site I used as my main reference: to get the spelling and such right, for the Russian WWII style propaganda slogans: www.allworldwars.com/Russian%20WWII%20Propaganda%20Posters.htmlI think the poster I mainly used was the 12th one down on that page's display or list of actual historical posters. |
|
|
|
Post by grandpamcgurk on Apr 1, 2015 12:41:00 GMT -5
I'm diggin' it!
|
|

