|
|
Post by wardster on Jan 28, 2015 22:58:02 GMT -5
Yeeeeooowww!!! you're scaring me to death and I'm not scared of anything !! .. Ha!!.. this is beautiful my friend ... Heehee! Thanks much for the "beautiful" comment! As for the "scaring me to death" part ... I sure hope not! I'm trying to encourage others (including "lurkers"), and show some cool techniques I've learned in my travels; and not intimidate anyone, or scare anyone off from participating / showing off their builds / whatever. But just in case the stuff I'm posting here is actually back-firing on me, and having the opposite-than-intended effect, I should mention (to anyone who may be concerned or put off or whatever) that I'm seriously considering NOT entering the larger model into the contest. I'll likely enter the smaller one (in the non-stock category) since that's a halfway "normal" sort of "doing a lot to improve on a standard kit" sort of build, but all along I've thought of the bigger one as a "display only" entry. I just want to build stuff. And want others to show what they're working on, too! Anyway ... thanks again for the compliments! |
|
|
|
Post by wardster on Jan 29, 2015 20:26:30 GMT -5
Update mode ON, again!
This time, I'm switching back to the smaller saucer. The immediate goals there being to get the big hole through the bottom of the saucer repaired (which is done, now) ... and I'm also starting on figuring out whatever I need to figure out, as far as angles / shapes / whatever, in regards to the two big headlights.
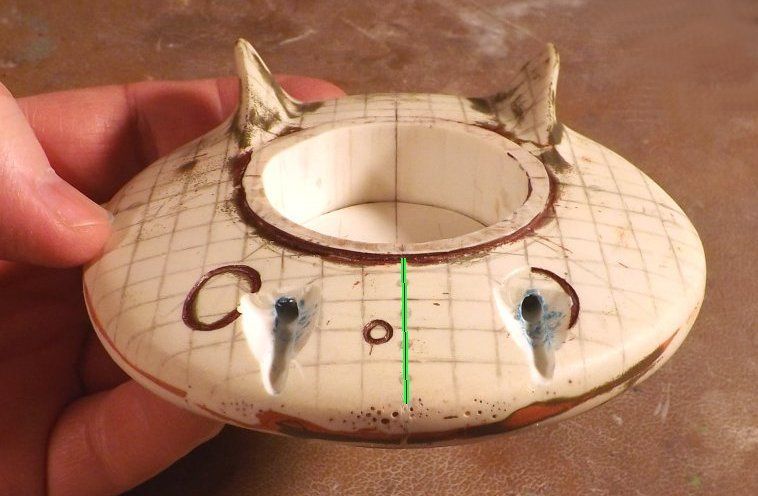
One thing I want to take some pains to mention is how badly off-center one -- (or both, depending on how you look at the situation?) -- of the original "scribe lines" (which indicated where the outlines of the two big headlights were supposed to be) were. I don't say that to be mean, or unfairly critical of the as-supplied kit's shape and/or detailing. I'm mentioning it mainly to say that's 90% of the reason I "stripped the paint," way back at the start of this thread. My thinking was that if I had to repair that situation -- (and, yeah, the more I "saw it" the more obvious to me that it was gonna bug me if I didn't "straighten things up" a bit) -- that so much damage would be done to the pre-existing paint job, that I may as well "just" strip all the paint off; square or even up some of the other things that didn't look 100% symmetrical ... giving me the side benefit of a mostly-bare resin surface; which was easier to draw on, with an ordinary pencil: so I could add rough grids.
One other thing (besides the off-center situation with the headlights, I mean) that had convinced me to strip the paint, way back when, and to "cut some things off" was that the outer ring for the bubbletop wasn't actually completely round along the interior of that circle (it was more of a pinched circle, or almost an oval shape) and the sort of large widget or thingie at the rear of that ring (which I presumed was supposed to be a cover for an implied ring-lifting mechanism) was also not following the imaginary centerline, as implied by the two fins in the back. It was almost like the craft was distorted from the forces of heavy acceleration while moving. The "bent" headlight locations and "bent" ring lifter make the craft look like it was making a permanent right-hand turn.
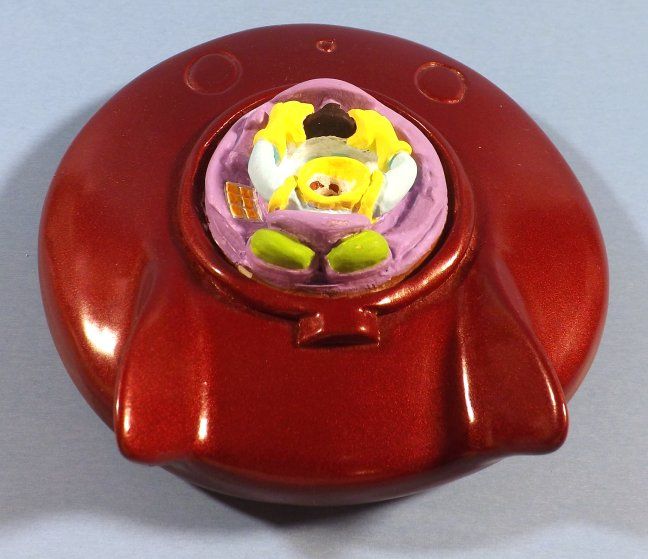
Once I had "seen that," it was going to be one of those things a person just can't un-see ... so, through no fault of his, Fletch's cool paint job got stripped off of the model. (Sorry about that, my friend!) In fairness to the kit's producers, I think the "available evidence" adds up in a way which seems to imply that a "permanent right turn" was their actual intent. That said, that's not my intent ... so, I'll be trying to make some things less "bent" and/or more symmetrical.
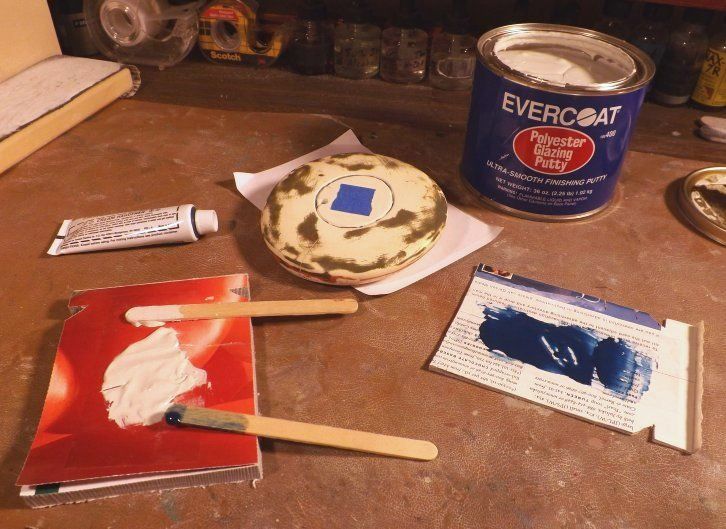
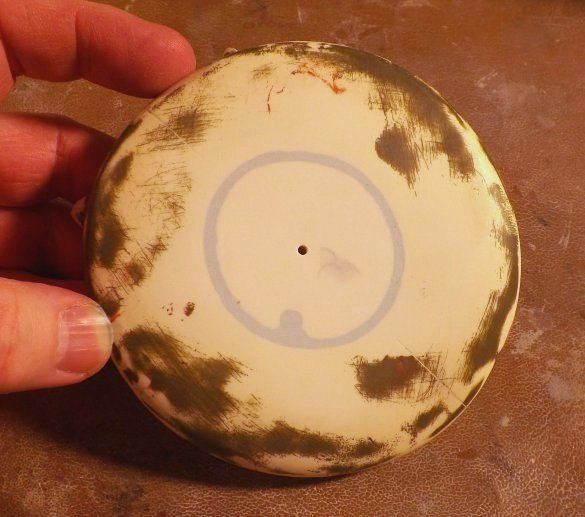
What I did to repair the hole through the craft was to add the "middle slice" I had made, way back on page one of this thread, back into the craft; except on the bottom. This addition being done with a view towards very carefully centering the "hold the model up, over the rocks" hole Fletch had made into the craft's bottom. That centering work, if my thinking-about-future-problems-as-I-go process cooperates as well as I hope it will, will make it a lot easier later on, to accomplish some of the "squaring off" or "evening up" work I need to do, both along the cockpit's walls, and the outer edges of the craft. Basically, I'm hoping to use that hole as a pivot point -- (sort of the "at the center" leg of a circle-making compass) -- but I'll get to explaining those plans / ideas better, in due time.
For clarity's sake, here's a "repeat" of another older photo: to show the "middle" slice which became the "repair part" on the craft's bottom side.
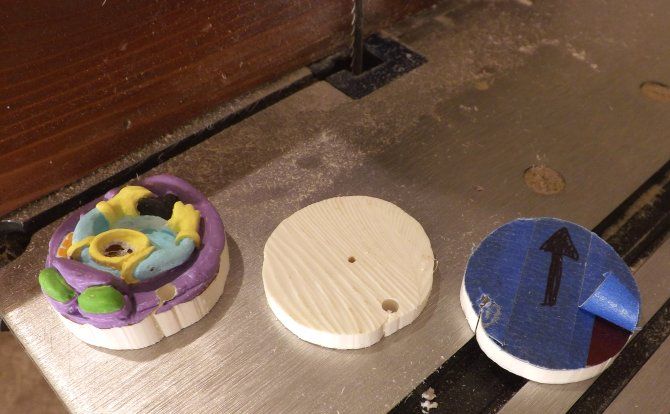
It's hard to tell from this photo, but the "slice" seen on the right is what used to be the craft's bottom. I'm saving that as a "paint chip," for the final paint job. I had no major use for the center piece of that three-piece "sandwich" ... so, that one became the "patch". |
|
|
|
Post by TooOld on Jan 30, 2015 18:07:41 GMT -5
I really enjoy watching a scratch built model come together like this , impressive work Ward ! And great photos too , keep'em coming !  |
|
|
|
Post by wardster on Feb 2, 2015 13:41:53 GMT -5
Thanks much! And I'll definitely keep at it!
I gotta / wanna take a (short!) mini-break from both of these vehicular models, to get in some "thinking ahead" practice on sculpting figures. I don't do that very often, at all, and so that sort of work isn't strongly in my "comfort zone" by any means ... so this feels like as good a time as any to play with doing a bit of sculpting. I'll post pics as I go -- (probably in another thread; with links here, to there) -- and I think I have a goofy-enough, quick-enough project idea to be a good way to "get unrusty" on all that. (A goofy monster head, to fit inside a spare helmet from the Red Baron show rod kit. Mostly "sculpted" out of plaster-and-vermiculite.)
As a 90% off-topic question: does anyone have a copy of Ed Roth's pamphlet on "How to Build Custom Car Bodies"? I'd like to see what he had to say about the plaster-and-vermiculite mixture he ended up using, to make the custom car and trike bodies he once built.
|
|
|
|
Post by Fletch on Feb 2, 2015 18:56:55 GMT -5
Hey Ward, I just sold all my Roth pamphlets but I still have this book and all he says is 12 100 pound bags of plaster were used in making the Mysterion.Attachment DeletedAttachment Deleted |
|
|
|
Post by wardster on Feb 10, 2015 0:55:31 GMT -5
Another mini-update for you folks. 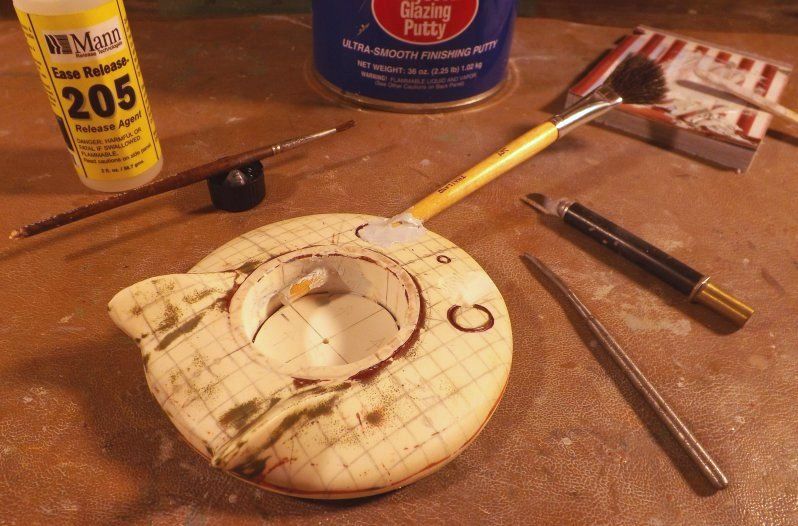 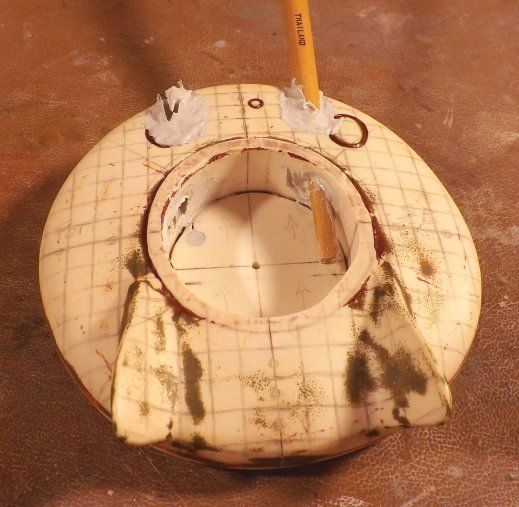 This may make more sense, later ... but what's going on in the shots above is that I'm making a shaped "tunnel" of sorts, for each "headlight". I had hogged the holes out, larger than needed, before ... and then, given the shape of the "exit hole" (as it were) that I would need to have, later on, I had decided (in figuring out how I was gonna get there) on a specific tapered paintbrush handle's shape, as the thing that would stand in for the hole's actual shape. I used some brush-on mold release material, on the handle (only); mixed up some of Evercoat's polyester glazing putty; glopped some into one headlight tunnel; stuck the "waxed" handle into the over-sized hole (which was full of mixed glazing putty); glopped some extra on, wherever needed; made sure the paintbrush handle was in there at a specific angle and depth (front to back -- note the pencil marks right behind the centerline marks, on the craft's floor) ... and waited till the putty hardened. Once I was sure the (ever so helpful!) goop had hardened enough, I applied a slow gentle twist or rotation to the handle, to break its surface loose from the glazing putty; I cleaned off the handle (paper towels); applied more mold release compound to the handle; and repeated it all for tunnel #2. The idea behind all this silliness is that whether I light these two headlights up, or not, I do want some sort of a "clear" looking cover there. (Presumably some epoxy resin, at a later stage.) The as-drawn location and/or shape of those two "headlight holes" isn't really ideal, for lighting Spaceman Spiff's path, as he comes in for his usual (hard!) landing ... but altering the sizes / shapes / locations of those lights, to make it actually work better, isn't the direction I wanted to go. I want the shapes of the headlight's outlines to be as close as I can get things, to what's seen in the comic strips ... but if I do light them up, later, the interior of those holes will have to have a fairly straight path from the light source(s) ... hence the earlier, drilled "straight line" holes ... and the tapered tunnels I just made. I'll likely end up having to fudge things, later on, as far as the actual outline of the headlights, as they appear to come through the saucer's upper surfaces ... but for now, I have two pretty consistently located / shaped holes to play with. I'll deal with the rest of those processes, later on. First things first, in this case! |
|

